Help Connecting to File Repository
Contents
- 1 The Basic Rundown
- 2 Help Connecting to File Repository
- 2.1 Download & Install a Git Client
- 2.2 Understand Git and Versional Control
- 2.3 Using the Repository
- 2.4 1. Connecting to the Repository
- 2.5 2. Pulling the Files
- 2.6 3. Create a New Branch
- 2.7 4. Editing Your project Files
- 2.8 5. Committing Changes
- 2.9 6.Merge Your Branch with the Head Branch or Publish a New Branch
- 2.10 5. Pushing Changes
- 3 Using Git and Unity 3D
The Basic Rundown
Read this first!!
These are the basic steps to connecting to a Git Repo
1. Account Creation
In a browser:
- Go to http://solar-10.wpi.edu/ and create a Gitlab account with your WPI email address
- Email Manzo (vj@wpi.edu) with your username, and the project(s) for which you need access
If you are using Windows, try "Connecting Through Tower GIT Client On Windows" first
Open Terminal (Mac), cmd.exe (Windows), or equivalent and:
- Generate a new SSH key (Not a Deploy Key!!) locally as described here using the command "To generate a new SSH key" (Log in using your Gitlab account credential to view if necessary). You can leave the additionally security password blank if desired.
- Copy the SSH key as described here using the commandTo copy your public key to the clipboard
In a browser:
- Add the SSH key info you just copied (Not a Deploy Key and not a Fingerprint!!) to your Gitlab profile here
2. Connecting Through Tower GIT Client
If you have Tower as your GIT client (Recommended for Mac and Windows), you can simply:
- click on the Cloud icon (or View>Show Services)
- select GitLab CE/EE
- select OAuth
- enter Host as http://solar-10.wpi.edu
- enter your username and password for your GitLab account
- enter your private token from http://solar-10.wpi.edu/profile/account
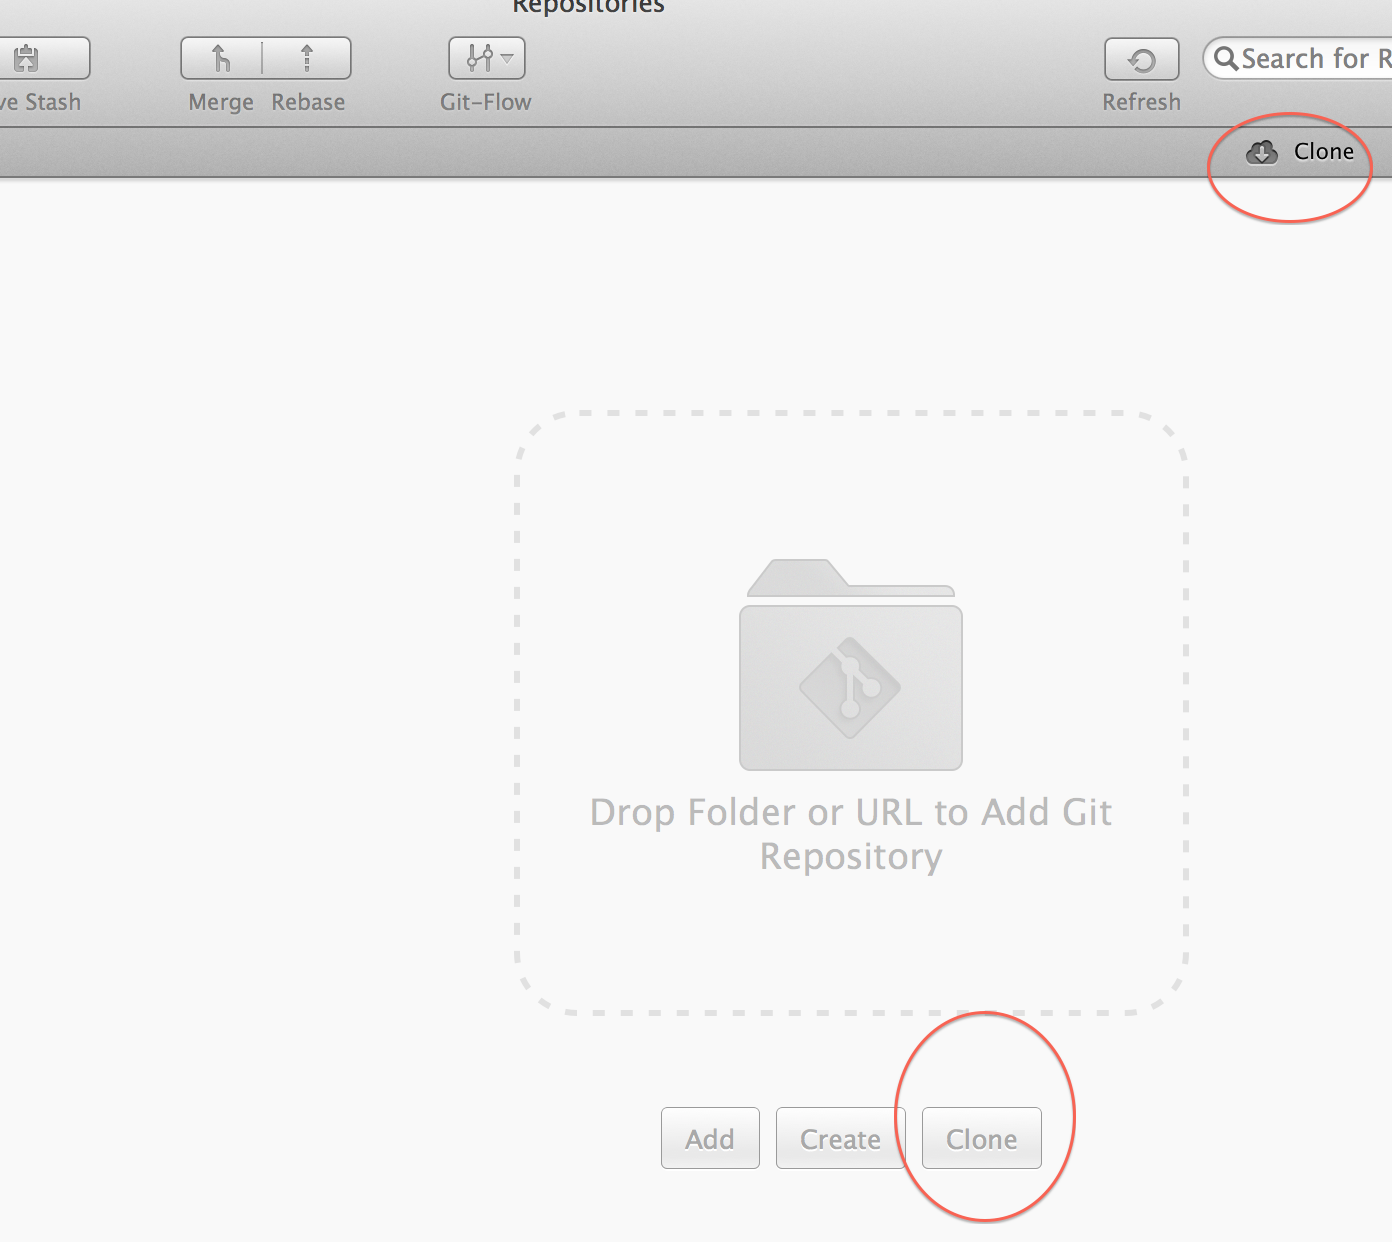
With this method, all repositories for which you have been give access will appear in the list. You simply need to clone them to your computer by clicking clone, choosing a place to save the files, and:
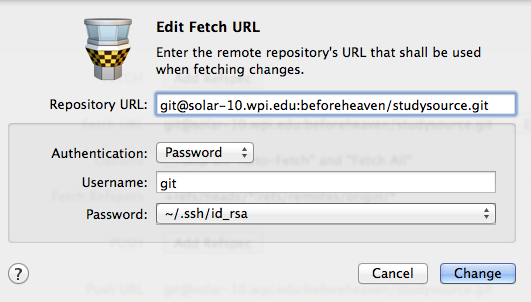
- Specifying the name git as the username
- Specify the private SSH key [~/.ssh/id_rsa] as the password.
3. Connecting Through Tower GIT Client On Windows
- log in to solar-10
- click on the project under "your projects"
- get the HTTP URL instead of SSH (directly under project name) {1}
- go to user account settings and get the Private Token {2}
- Install Tower (the following works for Version 1.2.2 Build 227)
- click on cloud in upper left
- add a "GitLab Community / Enterprise" account
- Authentication: Private Token
- Host: http://solar-10.wpi.edu
- Username and Password: GitLab credentials
- Token: {2}
- click on "Clone" in the upper right (has a cloud icon with a down arrow)
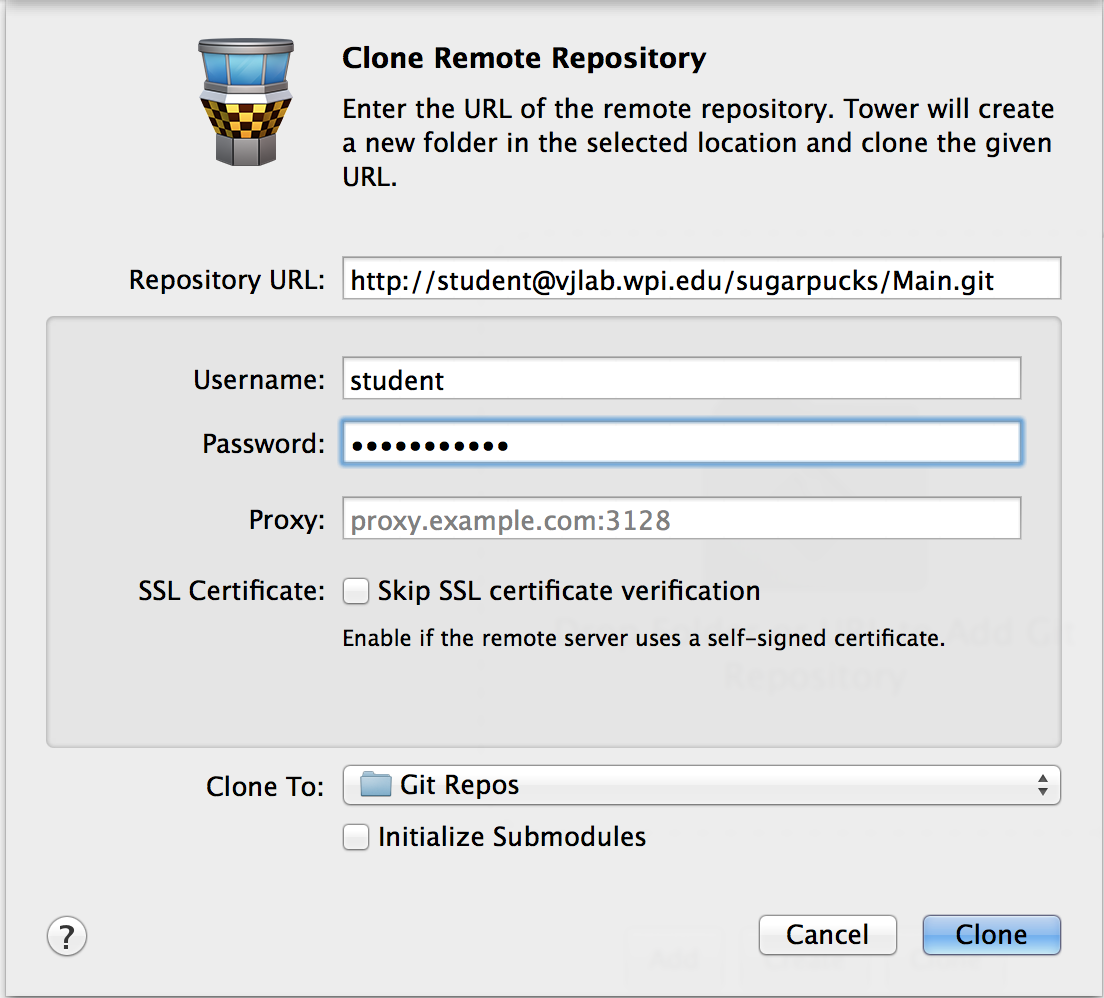
- enter {1} into "Repository URL" field
- use "Anonymous" for account
- specify "Clone To" location
- click "Clone" button
- Enter your solar-10 credentials when prompted
- At this point, everything should work
4. Connecting Through Other GIT Clients
Alternatively, if you're not using Tower as your GIT client, in your GIT client, such as Eclipse (Windows):
- Clone the GIT project using the SSH URL given on the related Wiki page on this site
- Specifying the name git as the username
- Specify the private SSH key [~/.ssh/id_rsa] as the password.
Help Connecting to File Repository
Download & Install a Git Client
A git client is used to connect to the file repositories for our projects. There are many commercial and free git clients out there. If you don't have one that you prefer, try the ones listed below.
Free Crossplatorm Solution Source Tree
For Mac: Tower
For Windows: Eclipse
Understand Git and Versional Control
Using a Git client allows us to collaborate on projects with version control. Using a Git client, you can download, or "pull" the latest changes to a project from the server, or "repository", modify them on your computer, and upload, or "push" the latest modified files back to repository.
Using the Repository
You need three pieces of information to connect to the repository:
- the remote repository address
- the username, and
- the password.
The repository link for each project is given on the project page. Make an account at the address provided, then ask Manzo for access.
1. Connecting to the Repository
Inside the git clients, look for something that says "Clone" or "Connect to Remote Repository". Remember: a "local repository" refers to the project folder on your computer (local) not the one on the project server (remote).
Add the appropriate 1) repository address, 2) username, and 3) password to the connection screen and click connect. You should also select a folder on your computer (locally) where you will store the project files.
2. Pulling the Files
Once you connect to the repository, the git client should automatically begin downloading, or "pulling", the files from the server to the folder you identified in the previous step. If this did not seem to happen automatically, look for an icon that says "Pull" while selected on the project name of the repository you've connected to.
3. Create a New Branch
While you're working on this project, others will be working on aspects of the project simultaneously. For this reason, we'll create a "branch" version of the project for you to work on. Later on, we'll either upload your branch as a new branch to or merge your branch with the master project. You "Absolutely 100% MUST MUST MUST please-for-the-love-of-all-things-sacred" create a new branch once you have pulled the initial project to your computer.
To create a new branch:
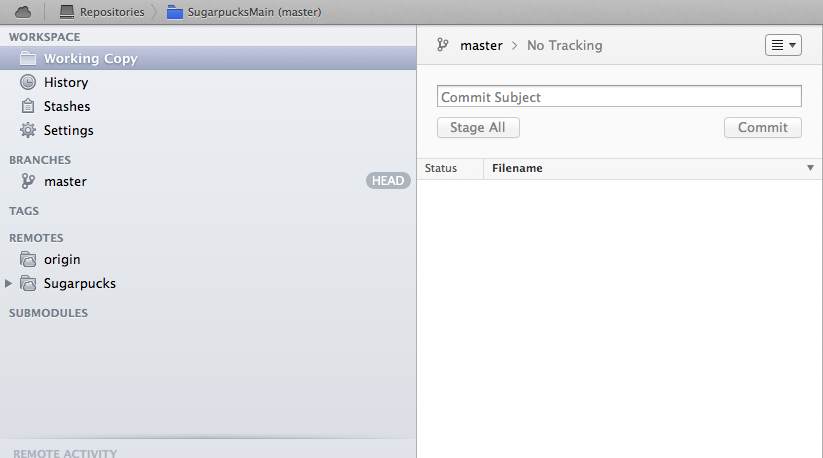
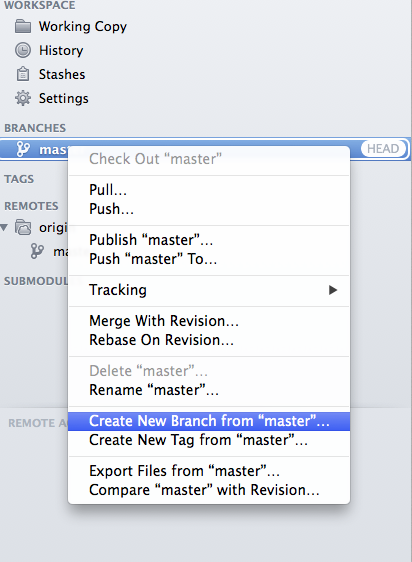
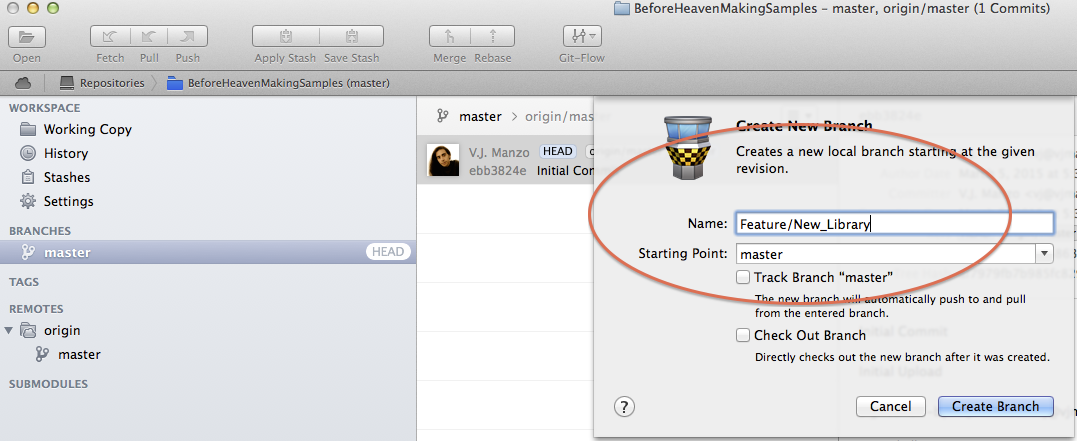
- Right click the master HEAD branch and click "Create New Branch from Master"
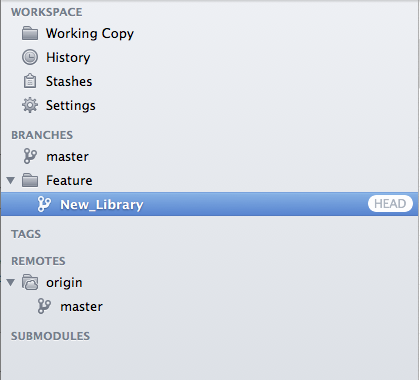
- Give the new branch a folder name like MyLastName and a branch name like NewFeature
- Finally, mark the new branch as the new HEAD branch by double clicking it. You will see the HEAD icon change to your branch. Any changes made to the git project files will be tracked in this new branch instead of the master head.
4. Editing Your project Files
Once the latest files are pulled, you can close the git client and open the local folder changing files as needed to work on the project (using Unity 3D, or Max, or whatever software is associated with those project files). You won't need to open the git client again until you are ready to "commit" the changes to the local project and "push" them to the remote repository. This is obviously the most important stage in the project's development.
5. Committing Changes
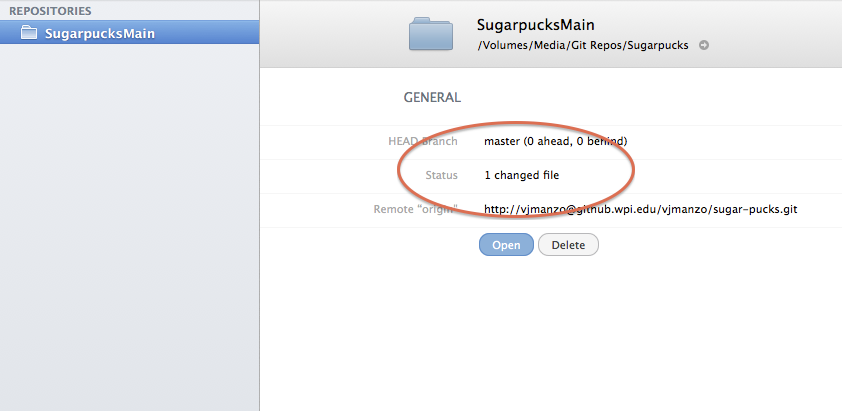
Once you made the edits you'd like to your project, open your git client again. It should note the files that have changed since you last opened your git client.
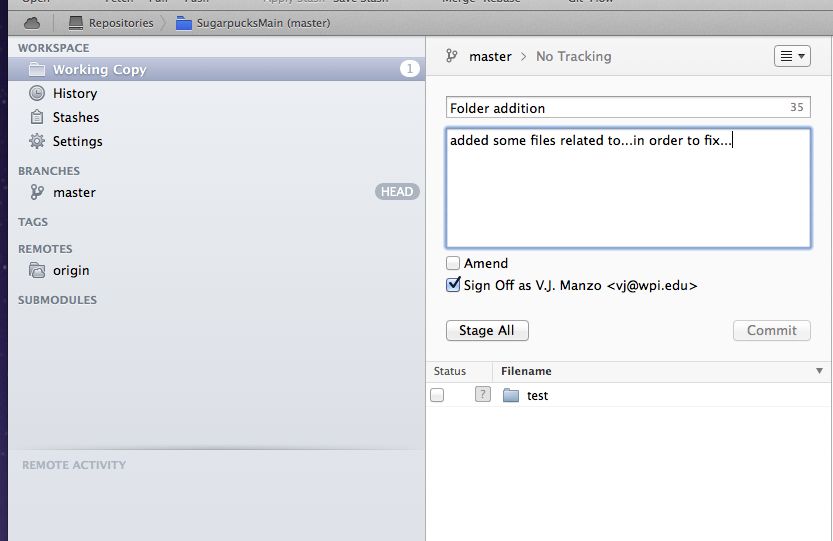
You need to "Commit" these changes to the local project so your git client can keep track of what you've done. Enter a "Commit" title and message describing the changes you've made to the project since you pulled the files from the server, and click the "Stage All Files" button to prepare them to be published to the remote repository. Note:Depending on number of edits you've done, the "Staging" process make take a little time before the git client allows you to click "Commit" and finalize this step. This tutorial provides no support if you have commitment issues.
In general, only commit related changes at one time "I modified the color scheme for these files", or "I added a sample instrument". Something simple. Don't wait until your commit message lists twenty different major changes to the project like "I restructured the folders, and deleted the old project, and modified the colors for these files, and...". That will make it difficult for everyone to track the evolution of the project. You do not need to commit all changed files shown in the staging area at one time. You can make multiple commits to keep things organized.
6.Merge Your Branch with the Head Branch or Publish a New Branch
Should I Merge My Branch or Publish a New Branch?
- If you are continuing the development of an existing project such as finishing a specific activity, or improving some aspect of the GUI, you should probably Merge your branch into the master branch as described below.
- If you are creating new or derivative work based on a template or some existing project such as making new activities, audio samples, characters, cutscenes, mini-games, you should probably Publish a New Branch as described below.
In either scenario, ask Manzo if you are unsure.
Merge Your Branch
Before we push your changes back to the repository, you'll want to merge your changes with the master HEAD branch.
To merge your branch with the master HEAD:
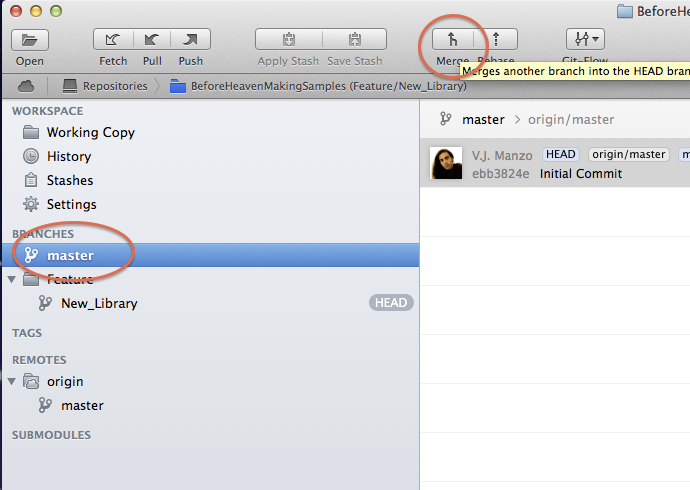
- Click the master HEAD branch from the left menu and click the "Merge" button to merge your branch to the HEAD branch
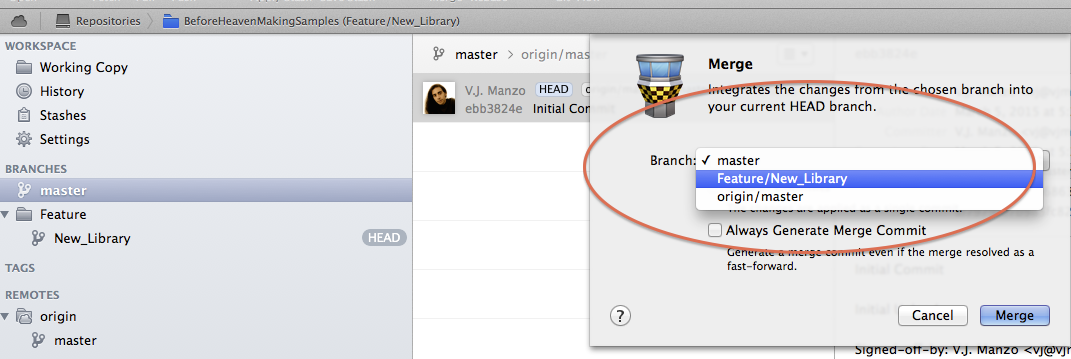
- Select the branch that you'd like to merge onto the HEAD branch
- Finally, click the Merge button to merge your changes. The final step is to publish your changes to the remote repository.
Publish a New Branch
If your new branch is so radically different from the original HEAD project on the server, such as a "we made a brand new derivative game from the existing game on the master HEAD", you'll want to push your branch to the repository as a new branch instead of merging your changes. Ask [[User:Vjmanzo Manzo] for permission about this first. In most cases, you will likely just need to merge your changes instead of creating a new branch.
To publish a new branch:
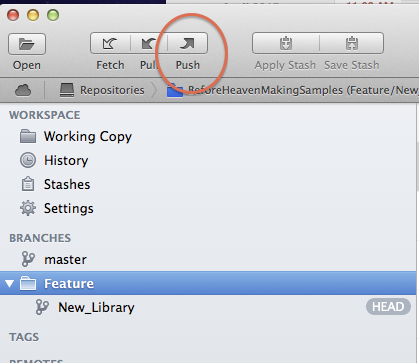
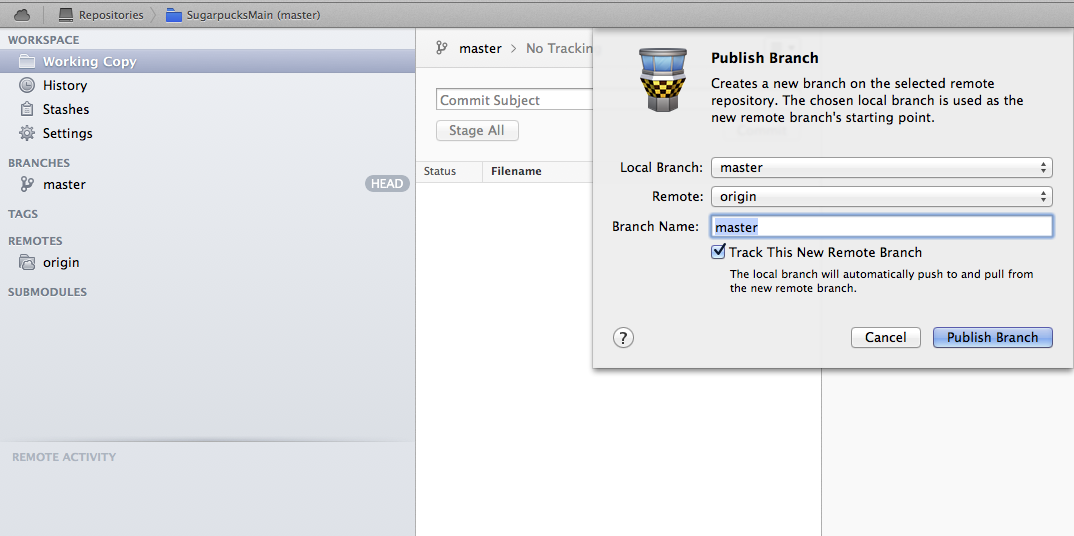
- Click your new branch from the left menu and click the "Push" button
- Select your branch from the dropdown menu (should be the same Folder>Branch structure on both menus
- Click Publish Branch
5. Pushing Changes
Finally, "Push" the changes by identifying the "Push" button in your git client. This will push your changes to the server. In some cases, Manzo will tell you when it is appropriate to making a new "branch" project, but, in general, push the changes to the "master" branch.
Using Git and Unity 3D
Set up your Unity project to work with Git (or any source control)
In Unity 3D:
- Navigate to Edit -> Project Settings -> Editor
- Change Version Control Mode to Visible Meta Files
- Change Asset Serialization Mode to Force Text
- Close and restart Unity3D
In your GIT client:
- Use the following Git Ignores in your client:
# =============== #
# Unity generated #
# =============== #
[Tt]emp/
[Oo]bj/
[Bb]uild
[Ll]ibrary/
sysinfo.txt
*.stackdump

# ===================================== #
# Visual Studio / MonoDevelop generated #
# ===================================== #
[Ee]xported[Oo]bj/
.vs/
/*.userprefs
/*.csproj
/*.pidb
/*.suo
/*.sln*
/*.user
/*.unityproj
/*.booproj

# ============ #
# OS generated #
# ============ #
.DS_Store*
._*
.Spotlight-V100
.Trashes
Icon?
ehthumbs.db
[Tt]humbs.db
