Difference between revisions of "Sound Engineering the Guitar"
| Line 1: | Line 1: | ||
| − | + | As a guitarist trying to launch a [https://www.youtube.com/channel/UCdAdqyG9p4HugSnUudW-J0A Youtube] channel, the endeavor of this E'20 term inquiry seminar was to explore the world of guitar recording and achieve a better sound presentation. I have a strong focus on rock music, and so EQ, Compression, and Distortion were very present topics of discussion. Throughout the course, the main tool of choice for both me and Prof. Manzo has been the [https://www.ableton.com/en/ Ableton] for the DAW, and [https://www.positivegrid.com/ PostivieGrid's ] ''BiasFX'' and ''BiasAmp'' VST's. | |
| − | |||
| − | |||
| − | |||
==Background== | ==Background== | ||
===Previous Background with Music=== | ===Previous Background with Music=== | ||
| − | I started playing in 6th grade | + | I started playing the guitar in 6th grade after developing a taste for heavy metal and guitar focused songs. This includes Canon Rock by Jerry C, Cliffs of Dover by Eric Johnson, Jordan by Buckethead, and Scarified by Paul Gilbert. Unfortunately, by the time 9th grade came along I would have stopped playing guitar. |
| − | I would re-find the spark in my 3rd year at WPI | + | I would re-find the spark in my 3rd year at WPI. I found myself interested in 90’s and 00’s alternative rock and Japanese rock music. After finally getting a digital analog to digital converter, I have been making song covers and uploading to YouTube. This also made me interested in WPI's music catalog, which can perhaps further my understanding and knowledge of music to improve my covers. |
| − | In D-term of 2020, when COVID-19 terrorized the world, I | + | In D-term of 2020, when COVID-19 terrorized the world, I took two WPI music classes: MU2300 (Foundations of Music Technology) and MU3615 (Topics In Digital Sound). I was introduced to Ableton, which finally replaced Audacity for sound engineering. This perhaps was a huge turning point in my career, as I was about to level up the sound quality of my guitar covers. |
===Motivation=== | ===Motivation=== | ||
| Line 26: | Line 23: | ||
==Getting the Right Tone== | ==Getting the Right Tone== | ||
===Understanding Amps=== | ===Understanding Amps=== | ||
| − | For the first part of the inquiry seminar, I explored briefly into some general principles of | + | For the first part of the inquiry seminar, I explored briefly into some general principles of the amplifier |
====Tube Amps vs Solid State Amps==== | ====Tube Amps vs Solid State Amps==== | ||
Tube amps and solid state amps differ in their methods of amplification. While tube amps are voltage driven, solid state amps are current driven. The general result is that tube amps amplifies greater texture, whereas solid state amps amplifies greater power and detail. From listening to a few examples, the tube amp complements nicely with bluesy styles due to its richer texture and dynamic range, while solid state amps are more suitable for rock or metal. | Tube amps and solid state amps differ in their methods of amplification. While tube amps are voltage driven, solid state amps are current driven. The general result is that tube amps amplifies greater texture, whereas solid state amps amplifies greater power and detail. From listening to a few examples, the tube amp complements nicely with bluesy styles due to its richer texture and dynamic range, while solid state amps are more suitable for rock or metal. | ||
| Line 35: | Line 32: | ||
===Recreating the Tone: Separate Ways=== | ===Recreating the Tone: Separate Ways=== | ||
| − | As an introduction to sound engineering, I worked on recreating the sound of the synthesizer from the intro of Journey's ''Separate Ways'' in Ableton. I used two sawtooth oscillators in sub-oscillator mode, and I de-tuned the second oscillator to achieve a slight | + | As an introduction to sound engineering, I worked on recreating the sound of the synthesizer from the intro of Journey's ''Separate Ways'' in Ableton. I used two sawtooth oscillators in sub-oscillator mode, and I de-tuned the second oscillator to achieve a slight phaser effect. Then the signal chain follows through to the Equalizer and the Reverb. For the equalizer, I did recognize the need to control lower frequencies, but failed to do the same for higher frequencies. This led to issues with the tone that will be fixed later on. |
| − | == | + | ==Getting a Great Guitar Tone== |
===General Guidelines=== | ===General Guidelines=== | ||
| − | + | Teenage guitarists have the affinity to crank up the distortion to the max and rock out with no sense for tone. Of course, I am guilty of this as well in my middle school years. Good sound comes from more than just distortion; normalization, equalization, and compression are also very important processes that need to be taken into account. A few guide lines that I learned were | |
* Normalization is required to make sure the volume is never unintentionally clipped | * Normalization is required to make sure the volume is never unintentionally clipped | ||
* Compression should be applied at the mastering stage, after maxing out the volume | * Compression should be applied at the mastering stage, after maxing out the volume | ||
| Line 47: | Line 44: | ||
[[File:Headphones.jpg|thumb|right|200px|The DT770 BeyerDynamics Headphone]] | [[File:Headphones.jpg|thumb|right|200px|The DT770 BeyerDynamics Headphone]] | ||
===Headphones=== | ===Headphones=== | ||
| − | One key problem earlier describe was my difficulty in differentiating between good EQ engineering and poor EQ engineering. | + | One key problem earlier describe was my difficulty in differentiating between good EQ engineering and poor EQ engineering. I have been using a cheap pair of headphones with low resolution, which as a result blurred the EQ quality. Acquiring a professional grade pair of headphones was in order. Some key factors that I found were |
* Choosing headphones that are 'Open' or 'Closed'. Open headphones give a more accurate sound of how live speakers should sound like, but closed headphones keeps the sound contained. | * Choosing headphones that are 'Open' or 'Closed'. Open headphones give a more accurate sound of how live speakers should sound like, but closed headphones keeps the sound contained. | ||
| − | * Finding a balance between treble and bass | + | * Finding a balance between treble and bass. |
| − | * Impedance level. Higher impedance headphones offer greater resolution at the expense of greater power requirements. Lower impedance headphones require less power, but the resolution is lower | + | * Impedance level. Higher impedance headphones offer greater resolution at the expense of greater power requirements. Lower impedance headphones require less power, but the resolution is lower. |
| − | * For higher impedance headphones, a microphone amplifier may be needed to supply those extra watts. Some of the higher-end audio interface can also offer more power | + | * For higher impedance headphones, a microphone amplifier may be needed to supply those extra watts. Some of the higher-end audio interface can also offer more power. |
| + | |||
| + | This was how I acquired the DT770 BeyerDynamics at 32 Ohms. The DT770 is known to be a classic choice even for professional sound engineers at an excellent price. Although a higher ohm rating would give better sound quality, I would either have to buy a headphone amp or an audio interace that can supply the necessary power. However, this was outside of my spending capacity. | ||
| + | |||
===PositiveGrid’s BiasFX and BiasAmp=== | ===PositiveGrid’s BiasFX and BiasAmp=== | ||
| − | As per reccomendation of Prof. Manzo, [https://www.positivegrid.com/ PostivieGrid's ] ''BiasFX'' and ''BiasAmp'' are excellent VST's to | + | As per reccomendation of Prof. Manzo, [https://www.positivegrid.com/ PostivieGrid's ] ''BiasFX'' and ''BiasAmp'' are excellent VST's to engineer guitar tones. With these two VST's a complete customization of the signal chain from start to finish can be achieved. It also comes with pre-customized packages: from default presets for a quick ballpark tone to downloadable fully designed signal chains that mimics signature sounds of famous guitarists. |
<gallery widths="500" heights="400"> | <gallery widths="500" heights="400"> | ||
File:Biasamp.png|Bias Amp | File:Biasamp.png|Bias Amp | ||
| Line 102: | Line 102: | ||
For the final cover, I chose Tengaku by Wagakki Band. I focused on making the compression provide the power needed for a heavy fast-paced rock song. In the beginning of the solo, there is a sweep picking section that (similar to tapping, but not to the same extent) needs a certain level of output from compression. Here, I used the aforementioned guidelines to get the tone similar to the original. | For the final cover, I chose Tengaku by Wagakki Band. I focused on making the compression provide the power needed for a heavy fast-paced rock song. In the beginning of the solo, there is a sweep picking section that (similar to tapping, but not to the same extent) needs a certain level of output from compression. Here, I used the aforementioned guidelines to get the tone similar to the original. | ||
<youtube>https://www.youtube.com/watch?v=gqh57OuRTWU</youtube> | <youtube>https://www.youtube.com/watch?v=gqh57OuRTWU</youtube> | ||
| + | |||
| + | [[Category:Sound Design]] | ||
| + | [[Category: Advisor:Manzo]] | ||
Revision as of 19:23, 5 July 2020
As a guitarist trying to launch a Youtube channel, the endeavor of this E'20 term inquiry seminar was to explore the world of guitar recording and achieve a better sound presentation. I have a strong focus on rock music, and so EQ, Compression, and Distortion were very present topics of discussion. Throughout the course, the main tool of choice for both me and Prof. Manzo has been the Ableton for the DAW, and PostivieGrid's BiasFX and BiasAmp VST's.
Contents
Background
Previous Background with Music
I started playing the guitar in 6th grade after developing a taste for heavy metal and guitar focused songs. This includes Canon Rock by Jerry C, Cliffs of Dover by Eric Johnson, Jordan by Buckethead, and Scarified by Paul Gilbert. Unfortunately, by the time 9th grade came along I would have stopped playing guitar.
I would re-find the spark in my 3rd year at WPI. I found myself interested in 90’s and 00’s alternative rock and Japanese rock music. After finally getting a digital analog to digital converter, I have been making song covers and uploading to YouTube. This also made me interested in WPI's music catalog, which can perhaps further my understanding and knowledge of music to improve my covers.
In D-term of 2020, when COVID-19 terrorized the world, I took two WPI music classes: MU2300 (Foundations of Music Technology) and MU3615 (Topics In Digital Sound). I was introduced to Ableton, which finally replaced Audacity for sound engineering. This perhaps was a huge turning point in my career, as I was about to level up the sound quality of my guitar covers.
Motivation
Having gotten into creating song covers and learning the new tool that is Ableton, this inquiry seminar became a way to push my knowledge and ability of both of these skills to the next level. I find myself struggling with EQ and Compression Manipulation, and found it difficult to differentiate between good EQ engineering and poor EQ engineering.
Equipment
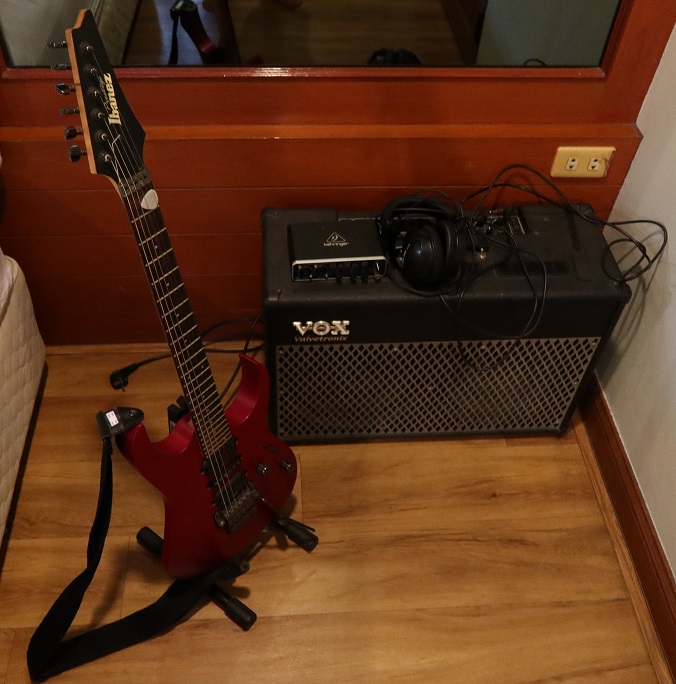
- Ibanez Prestige Electric Guitar
- Behringer U-Phoria UMC2-2HD Audio Interface
- DT770 Beyerdynamic Headphones
Getting the Right Tone
Understanding Amps
For the first part of the inquiry seminar, I explored briefly into some general principles of the amplifier
Tube Amps vs Solid State Amps
Tube amps and solid state amps differ in their methods of amplification. While tube amps are voltage driven, solid state amps are current driven. The general result is that tube amps amplifies greater texture, whereas solid state amps amplifies greater power and detail. From listening to a few examples, the tube amp complements nicely with bluesy styles due to its richer texture and dynamic range, while solid state amps are more suitable for rock or metal.
Impedance
Impedance levels indicate the levels at which sound can pass through. Prof. Manzo's textbook mentions three levels: Line level, Microphone Level, and Instrument Level, ordered by the levels. For example, plugging in a microphone will result in barely any sound, since the impedance level of the microphone is higher than the line level. On the other hand, plugging a microphone into the instrument level will resort in distortion.
Impulse Response
Impulse Response is a way to recreate the sound of a rig set-up. This is done by recording the existing rig into the computer, and using an impulse response software to transform the signal.
Recreating the Tone: Separate Ways
As an introduction to sound engineering, I worked on recreating the sound of the synthesizer from the intro of Journey's Separate Ways in Ableton. I used two sawtooth oscillators in sub-oscillator mode, and I de-tuned the second oscillator to achieve a slight phaser effect. Then the signal chain follows through to the Equalizer and the Reverb. For the equalizer, I did recognize the need to control lower frequencies, but failed to do the same for higher frequencies. This led to issues with the tone that will be fixed later on.
Getting a Great Guitar Tone
General Guidelines
Teenage guitarists have the affinity to crank up the distortion to the max and rock out with no sense for tone. Of course, I am guilty of this as well in my middle school years. Good sound comes from more than just distortion; normalization, equalization, and compression are also very important processes that need to be taken into account. A few guide lines that I learned were
- Normalization is required to make sure the volume is never unintentionally clipped
- Compression should be applied at the mastering stage, after maxing out the volume
- Analog equipment (as opposed to VSTs) can give a ‘warmer sound’. There may be incentive to invest in actual physical gear, rather than just relying on digital effects simulators.
Headphones
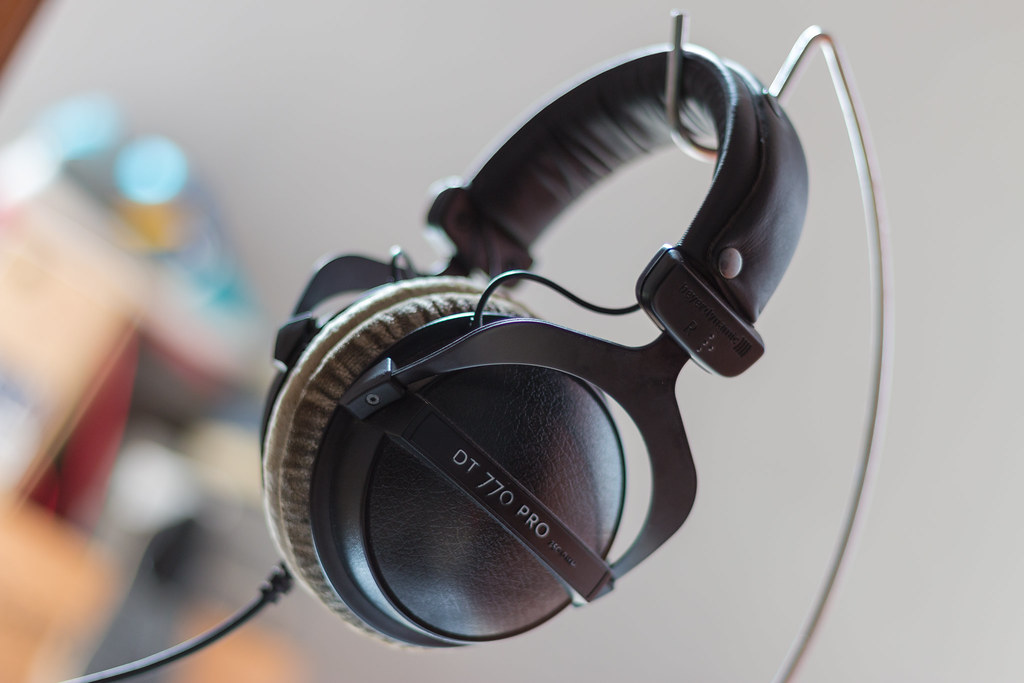
One key problem earlier describe was my difficulty in differentiating between good EQ engineering and poor EQ engineering. I have been using a cheap pair of headphones with low resolution, which as a result blurred the EQ quality. Acquiring a professional grade pair of headphones was in order. Some key factors that I found were
- Choosing headphones that are 'Open' or 'Closed'. Open headphones give a more accurate sound of how live speakers should sound like, but closed headphones keeps the sound contained.
- Finding a balance between treble and bass.
- Impedance level. Higher impedance headphones offer greater resolution at the expense of greater power requirements. Lower impedance headphones require less power, but the resolution is lower.
- For higher impedance headphones, a microphone amplifier may be needed to supply those extra watts. Some of the higher-end audio interface can also offer more power.
This was how I acquired the DT770 BeyerDynamics at 32 Ohms. The DT770 is known to be a classic choice even for professional sound engineers at an excellent price. Although a higher ohm rating would give better sound quality, I would either have to buy a headphone amp or an audio interace that can supply the necessary power. However, this was outside of my spending capacity.
PositiveGrid’s BiasFX and BiasAmp
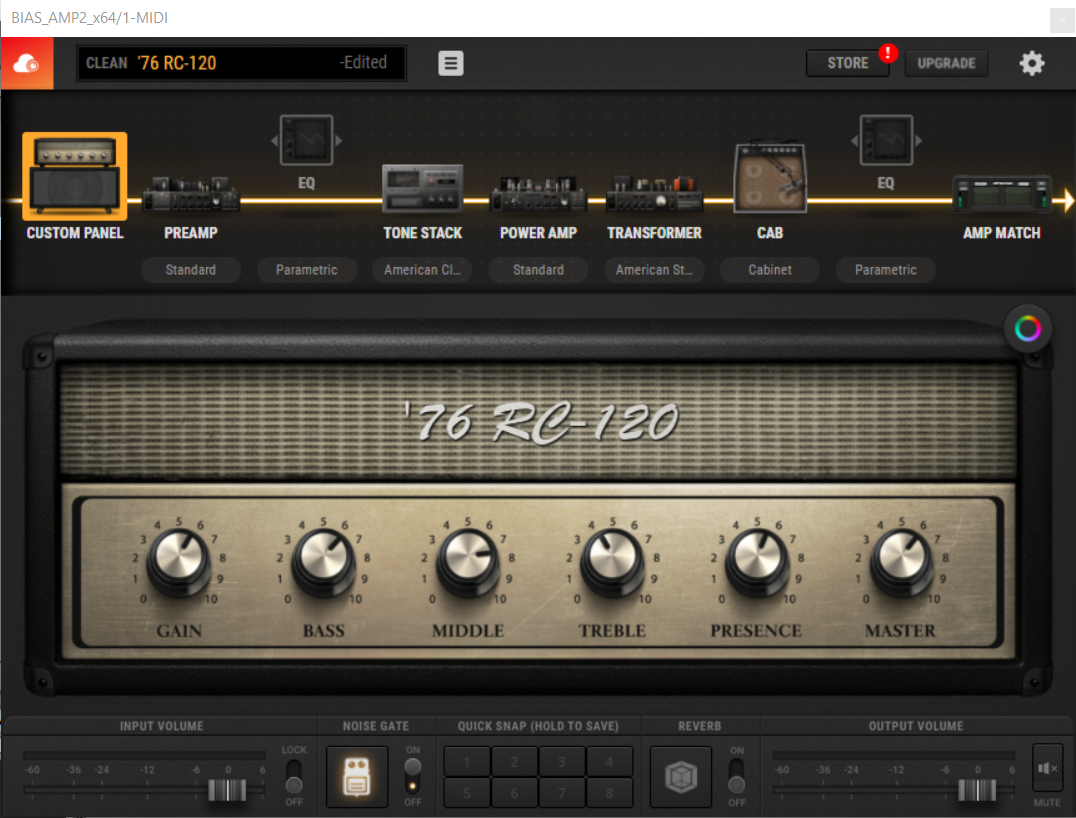
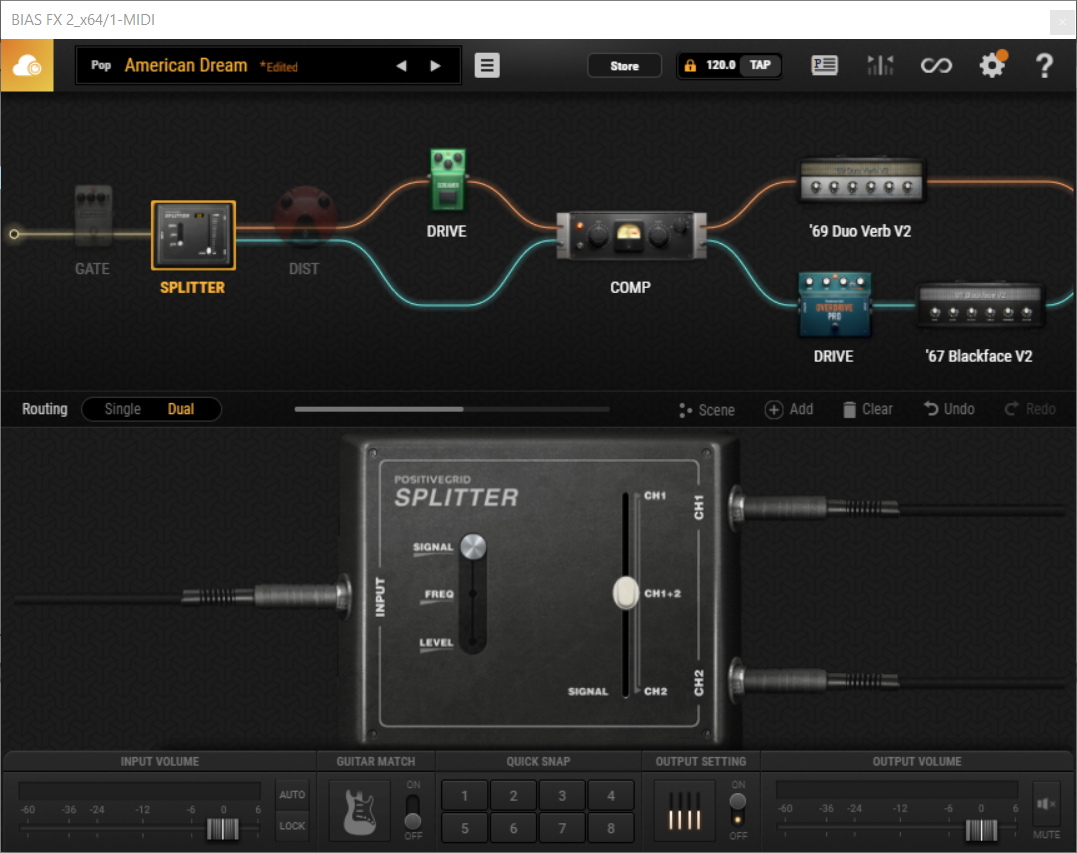
As per reccomendation of Prof. Manzo, PostivieGrid's BiasFX and BiasAmp are excellent VST's to engineer guitar tones. With these two VST's a complete customization of the signal chain from start to finish can be achieved. It also comes with pre-customized packages: from default presets for a quick ballpark tone to downloadable fully designed signal chains that mimics signature sounds of famous guitarists.
Recreating the Tone: Highway Star
For the first guitar cover assignment I performed a cover of Deep Purple's Highway Star. I would describe Ritchie Blackmore's tone as whiney, powerful, and raw, which was something I tried to capture using only BiasAmp. I paired the SLO 100 amp with the Jazz Clean cabinet to produce my sound.
Recreating the Rhoads Sound
For the second cover, I worked on recreating Randy Rhoads' signature sound in The Blizzard of Ozz. A guitar tone haracterized by its raw distortion paired with the chorus effects to create a very tight and aggressive sound. Where as in Highway Star I had to try to mimic the tone completely by ear, Randy Rhoads' rig rundown was available on the internet, and the Bias Amp and the BiasFx VST's offered the tools needed to make a complete duplicate.
The Rig Rundown
As seen in FigureX, Rhoads' rig consists of a series of MXR pedals which provides various effects, namely distortion, wah, EQ, and chorus. This was achieved by setting up a similar pedal chain in BiasFX.
Then, the chain is connected to two parallel Marshall Lead 100 Amps, which once again can be recreated in BiasAmp
Mr. Crowley
For the first Randy Rhoads' song to cover I went with Mr. Crowley. A feature that stands out is Rhoads' is the use of chorus, which gives the guitar depth, as if multiple guitars are playing. Media:Mrcrowley.wav
Crazy Train
Having achieved a reasonably similar sound to Rhoads, I moved on to a cover of Crazy Train. However, because the solo features a lot of tapping, hammer ons, and pull offs, it was vital that the signal chain provide the necessary power to get a whole and powerful sound.
Compression
As explained earlier, compression is a major part of sound engineering. Compression, or dynamic range compression, is the process of leveling the dynamic range of audio through amplifying quiet sounds and/or reducing loud sounds. There are four main types of compression:
- Voltage Controlled Amplifier - The most commonly used compressor. It is associated with the attack/release/threshold/ratio controls
- Optical - Operates using a light dependent. The dynamic ranged is controlled non-linearly, which can give a smoother compression.
- Field Effect Transistor - Very often used for guitars. Has fast attack times.
- Delta Mu - A compressor whose compression can be described as 'smooth', 'thick', and 'creamy'
1176 Compressor
The 1176 compressor is an FET compressor and was one of the hallmark compressors of the rock and roll era. BiasFX has a compressor which is 'inspired by' the 1176, which became my compressor of choice.
As a general guideline for compression with the 1176, starting with these settings is reccomended:
- Set Attack to 4
- Set Release to 7
- Make sure GR is not more than -3db
- Make sure Pre-AMP and Output is not hitting the red.
Tengaku
For the final cover, I chose Tengaku by Wagakki Band. I focused on making the compression provide the power needed for a heavy fast-paced rock song. In the beginning of the solo, there is a sweep picking section that (similar to tapping, but not to the same extent) needs a certain level of output from compression. Here, I used the aforementioned guidelines to get the tone similar to the original.


