Difference between revisions of "How to Change a String (with Locking Tuners)"
From vjmedia
(→Supplies Needed) |
|||
| (67 intermediate revisions by the same user not shown) | |||
| Line 1: | Line 1: | ||
| − | |||
| − | + | [[Ongoing_Research_Projects | '''Go Back to Main Project Menu''']] | |
| + | <br> | ||
| − | + | __NOTOC__ | |
| − | + | '''Important:''' Go slowly with every part of this process in order to minimize the risk of damaging the instruments, cutting yourself, or poking your eye out with an old guitar string. Place the guitar on a flat surface that is covered with a towel or other soft surface. | |
| + | <br><br> | ||
| + | '''Special Note:''' Do not use any solvents, cleaners, oils, or other things on fretboards while changing the strings; for Parker Fly guitars, you may use a little water on a microfiber cloth to clean the fretboard. | ||
| + | <br><br> | ||
| − | == | + | ===Supplies Needed=== |
| + | *guitar or bass with old strings | ||
| + | *new strings (located in lab on pegboard in a bin labeled "new strings") | ||
| + | *string cutters (located in lab on pegboard) | ||
| + | *needle-nose pliers (located in lab on pegboard) | ||
| + | *microfiber cloth (located in lab on pegboard) | ||
| + | *tuner (located in lab on pegboard in bin nearest door) | ||
| + | <br><br> | ||
| − | == | + | ==Remove the Old Strings== |
| + | <br><br> | ||
| − | == | + | ===Detune the lowest string with the tuning peg until it drops as low as it can go=== |
| + | <mediaplayer image='https://vjmedia.wpi.edu/images/2/22/Loosen_tuner.jpg'>File:Loosen tuner.m4v</mediaplayer> | ||
| + | <hr> | ||
| + | <br> | ||
| + | <br> | ||
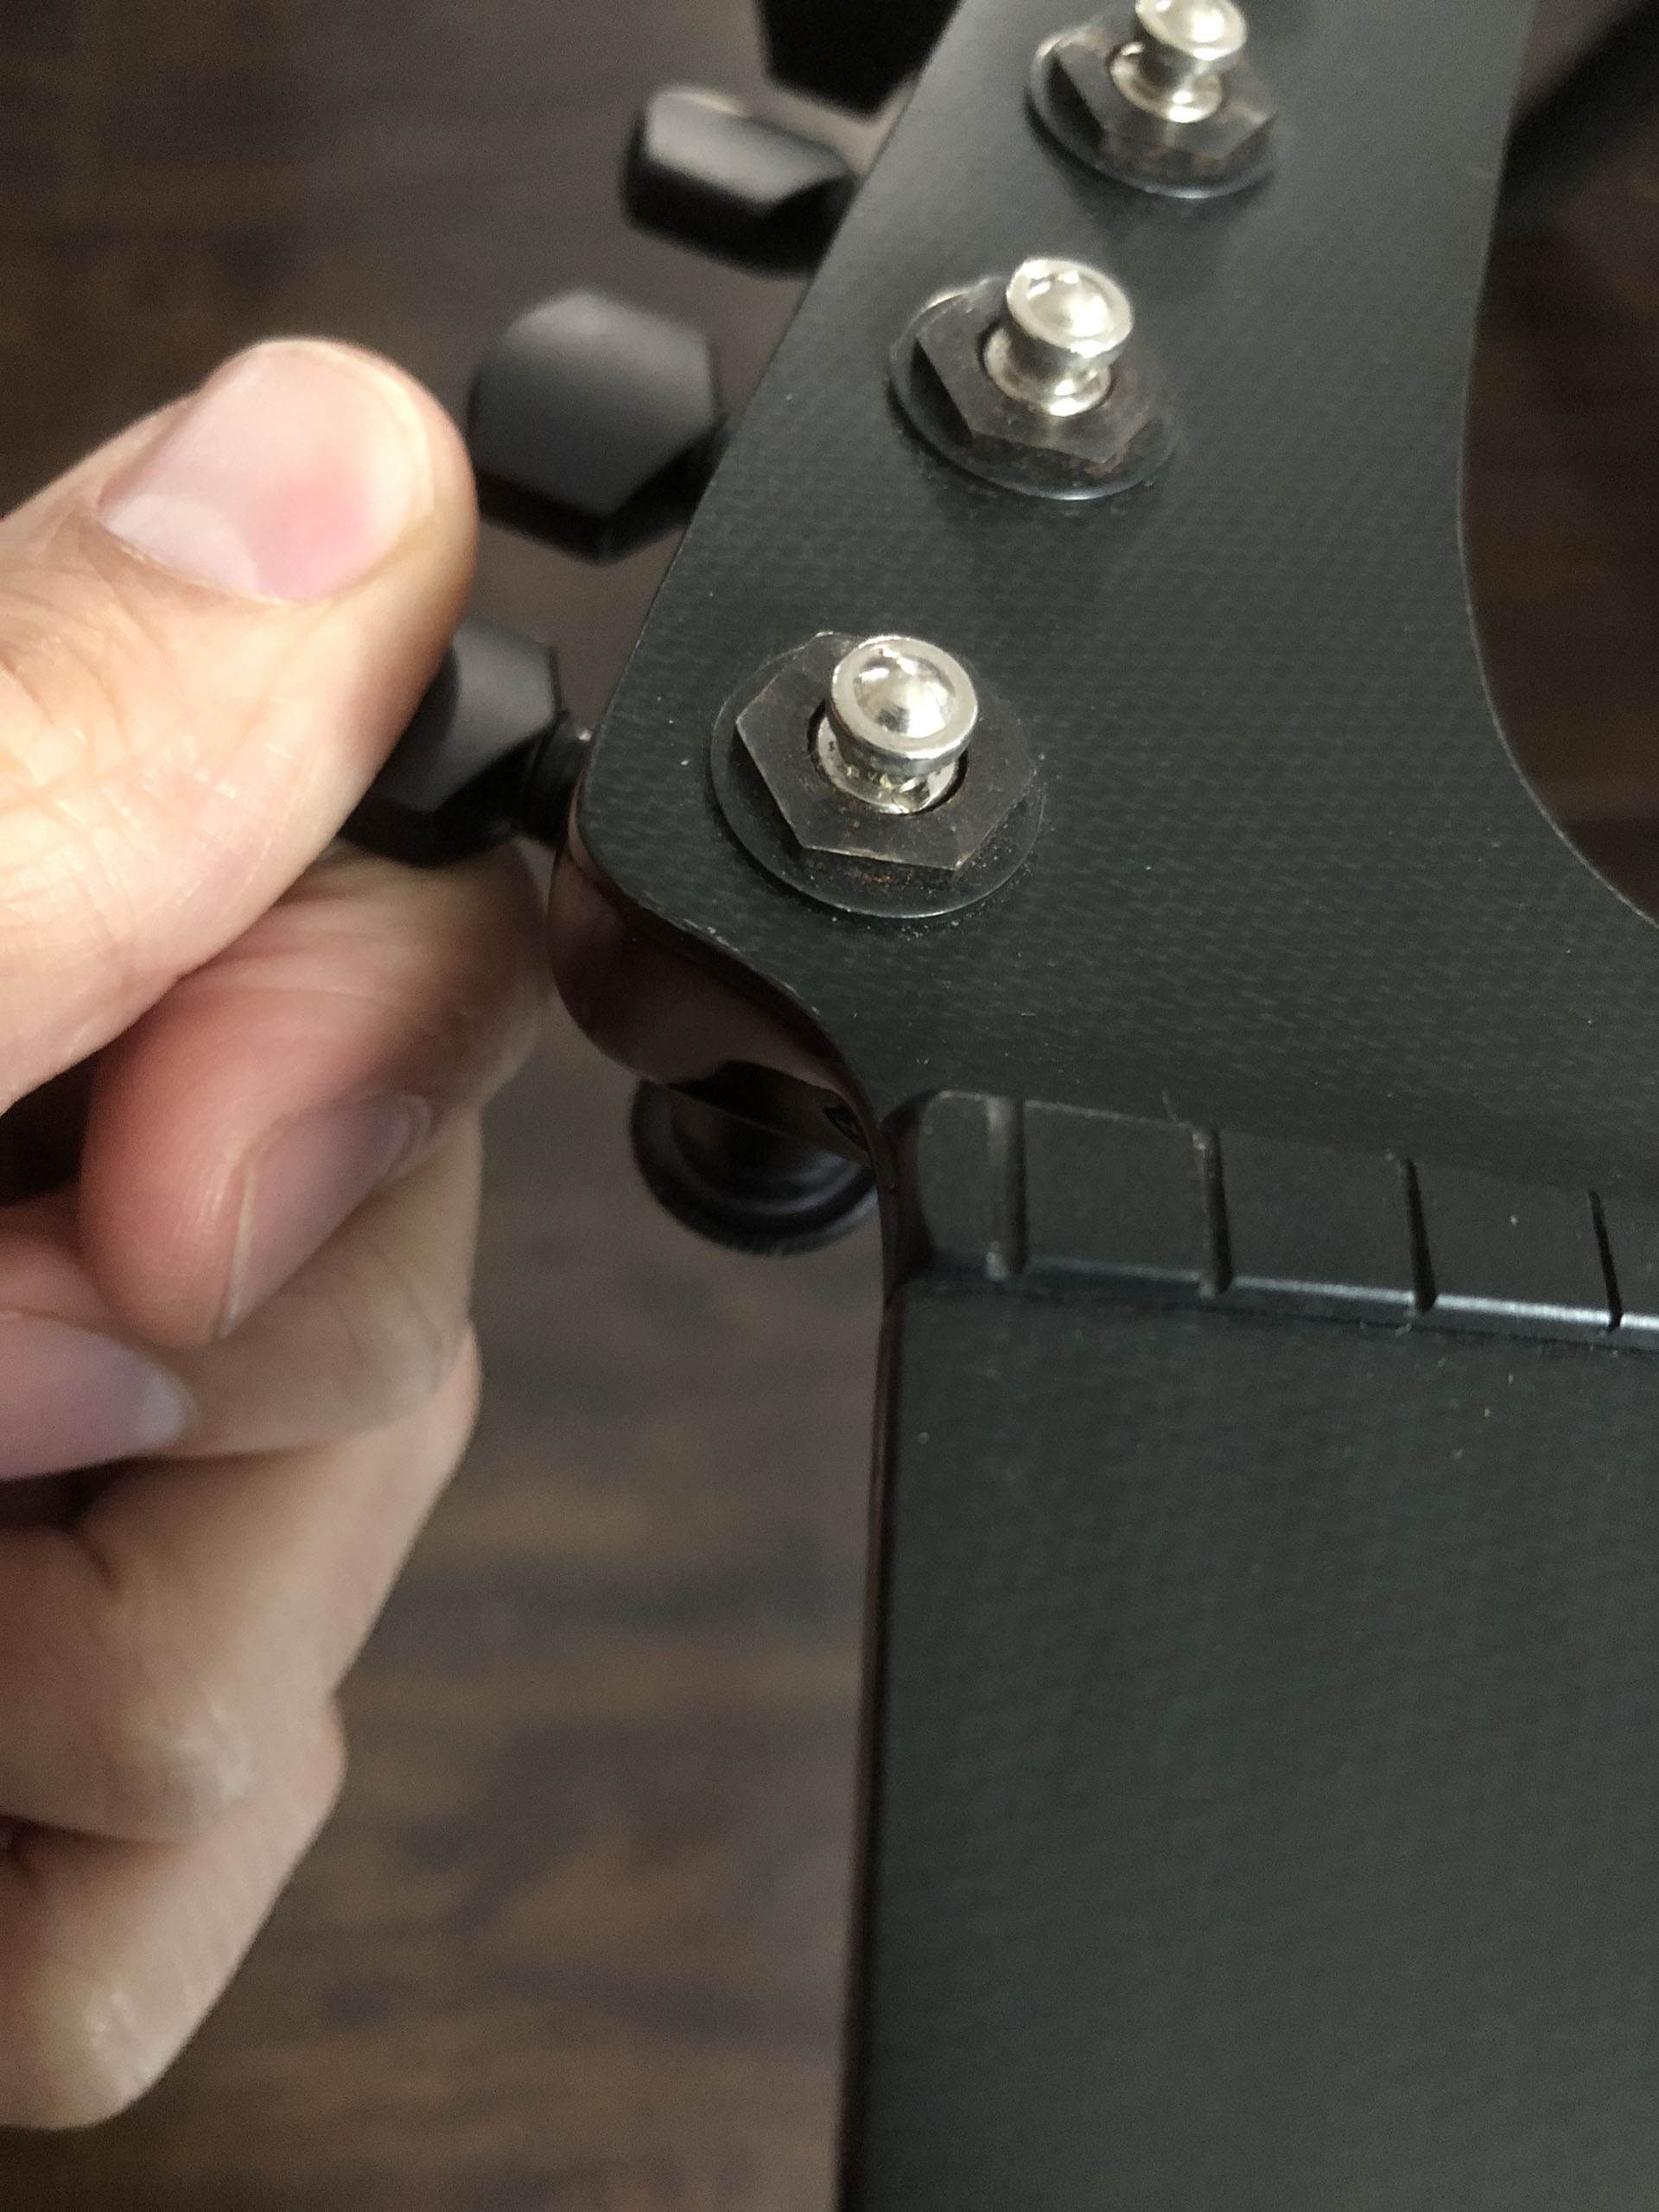
| − | == | + | ===Loosen the locking mechanism on the back of the tuning peg as much as it will loosen=== |
| + | [[File:Tighten lock.jpg|400px|]] | ||
| + | <hr> | ||
| + | <br> | ||
| + | <br> | ||
| − | == | + | ===Carefully cut the end of the string with string cutters above the hex plate that holds the tuning peg into the headstock=== |
| + | [[File:Clip string tuner.jpg|400px|]] | ||
| + | <hr> | ||
| + | <br> | ||
| + | <br> | ||
| − | == | + | ===Carefully pull the string out of the hole with needle-nose pliers (Do not use anything sharp!)=== |
| + | [[File:String pliers.png|400px|]] | ||
| + | <hr> | ||
| + | <br> | ||
| + | <br> | ||
| − | == | + | ===Gently push the string 1 inch through the hole of the bridge=== |
| + | [[File:Clip string bridge.jpg|400px|]] | ||
| + | <hr> | ||
| + | <br> | ||
| + | <br> | ||
| − | == | + | ===Cut the string above the bridge=== |
| + | <hr> | ||
| + | <br> | ||
| + | <br> | ||
| − | == | + | ===Very gently pull the remainder of the string through the bridge=== |
| + | <hr> | ||
| + | <br> | ||
| + | <br> | ||
| − | == | + | ===Repeat the process for all other strings=== |
| + | <hr> | ||
| + | <br> | ||
| + | <br> | ||
| − | == | + | ===Throw away the old strings including any clippings=== |
| + | <hr> | ||
| + | <br> | ||
| + | <br> | ||
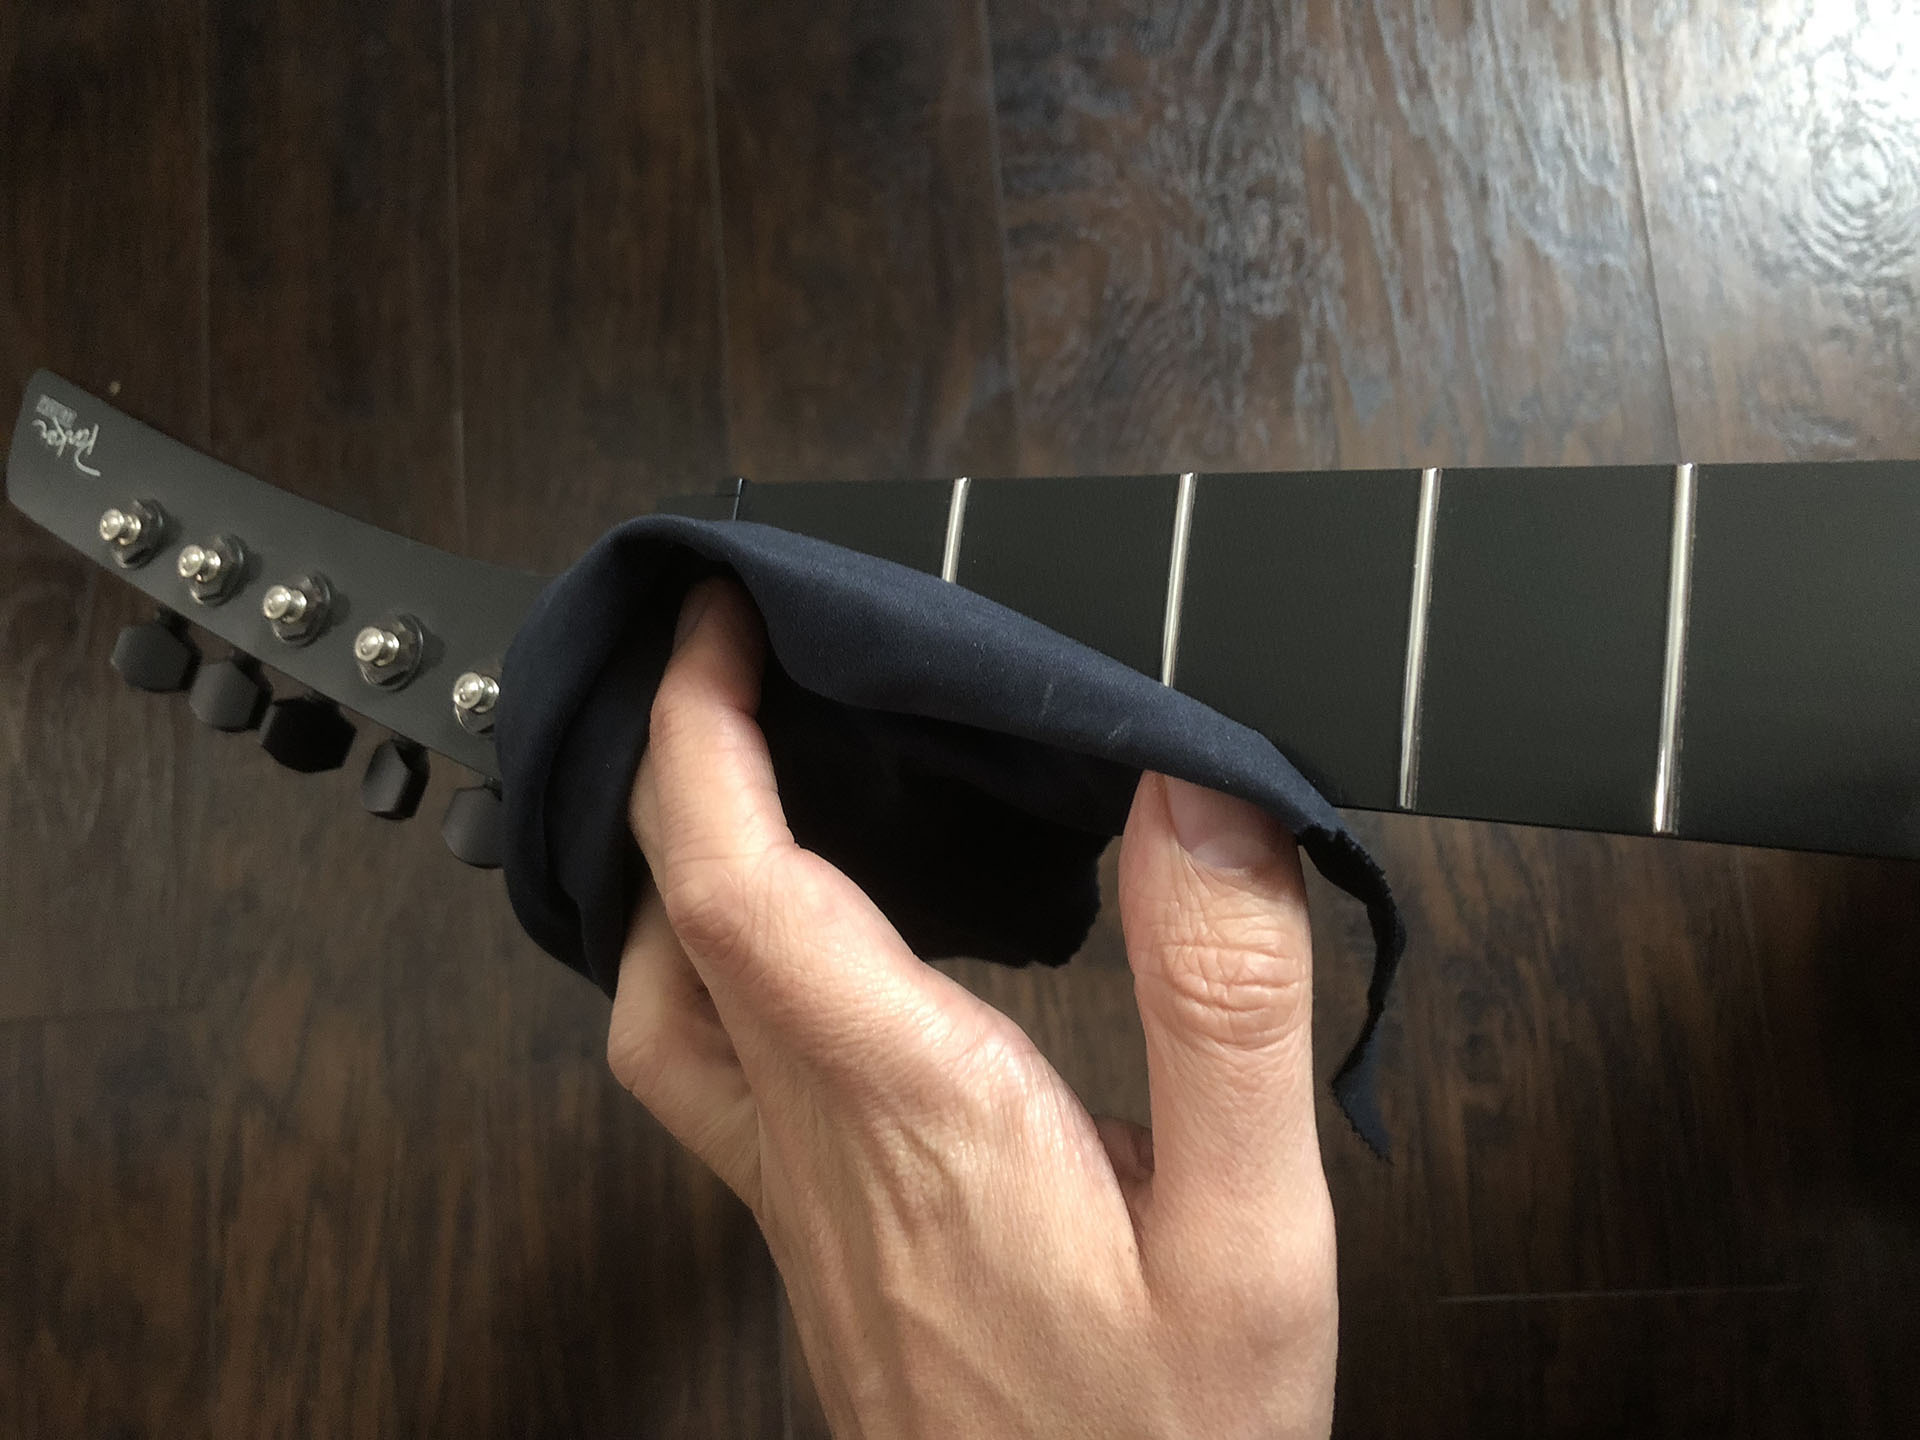
| − | == | + | ===Gently wipe down the fretboard and body with a dry microfiber cloth removing any dirt seen; '''do not''' use any solvents, oils, or other chemicals on the fretboard and do not scratch the fretboard=== |
| + | [[File:Wipe neck.jpg|400px|]] | ||
| + | <hr> | ||
| + | <br><br><br> | ||
| − | == | + | ==Put on the New Strings== |
| + | <br><br> | ||
| − | == | + | ===Wash your hands with soap and water; dry your hands=== |
| + | <hr> | ||
| + | <br> | ||
| + | <br> | ||
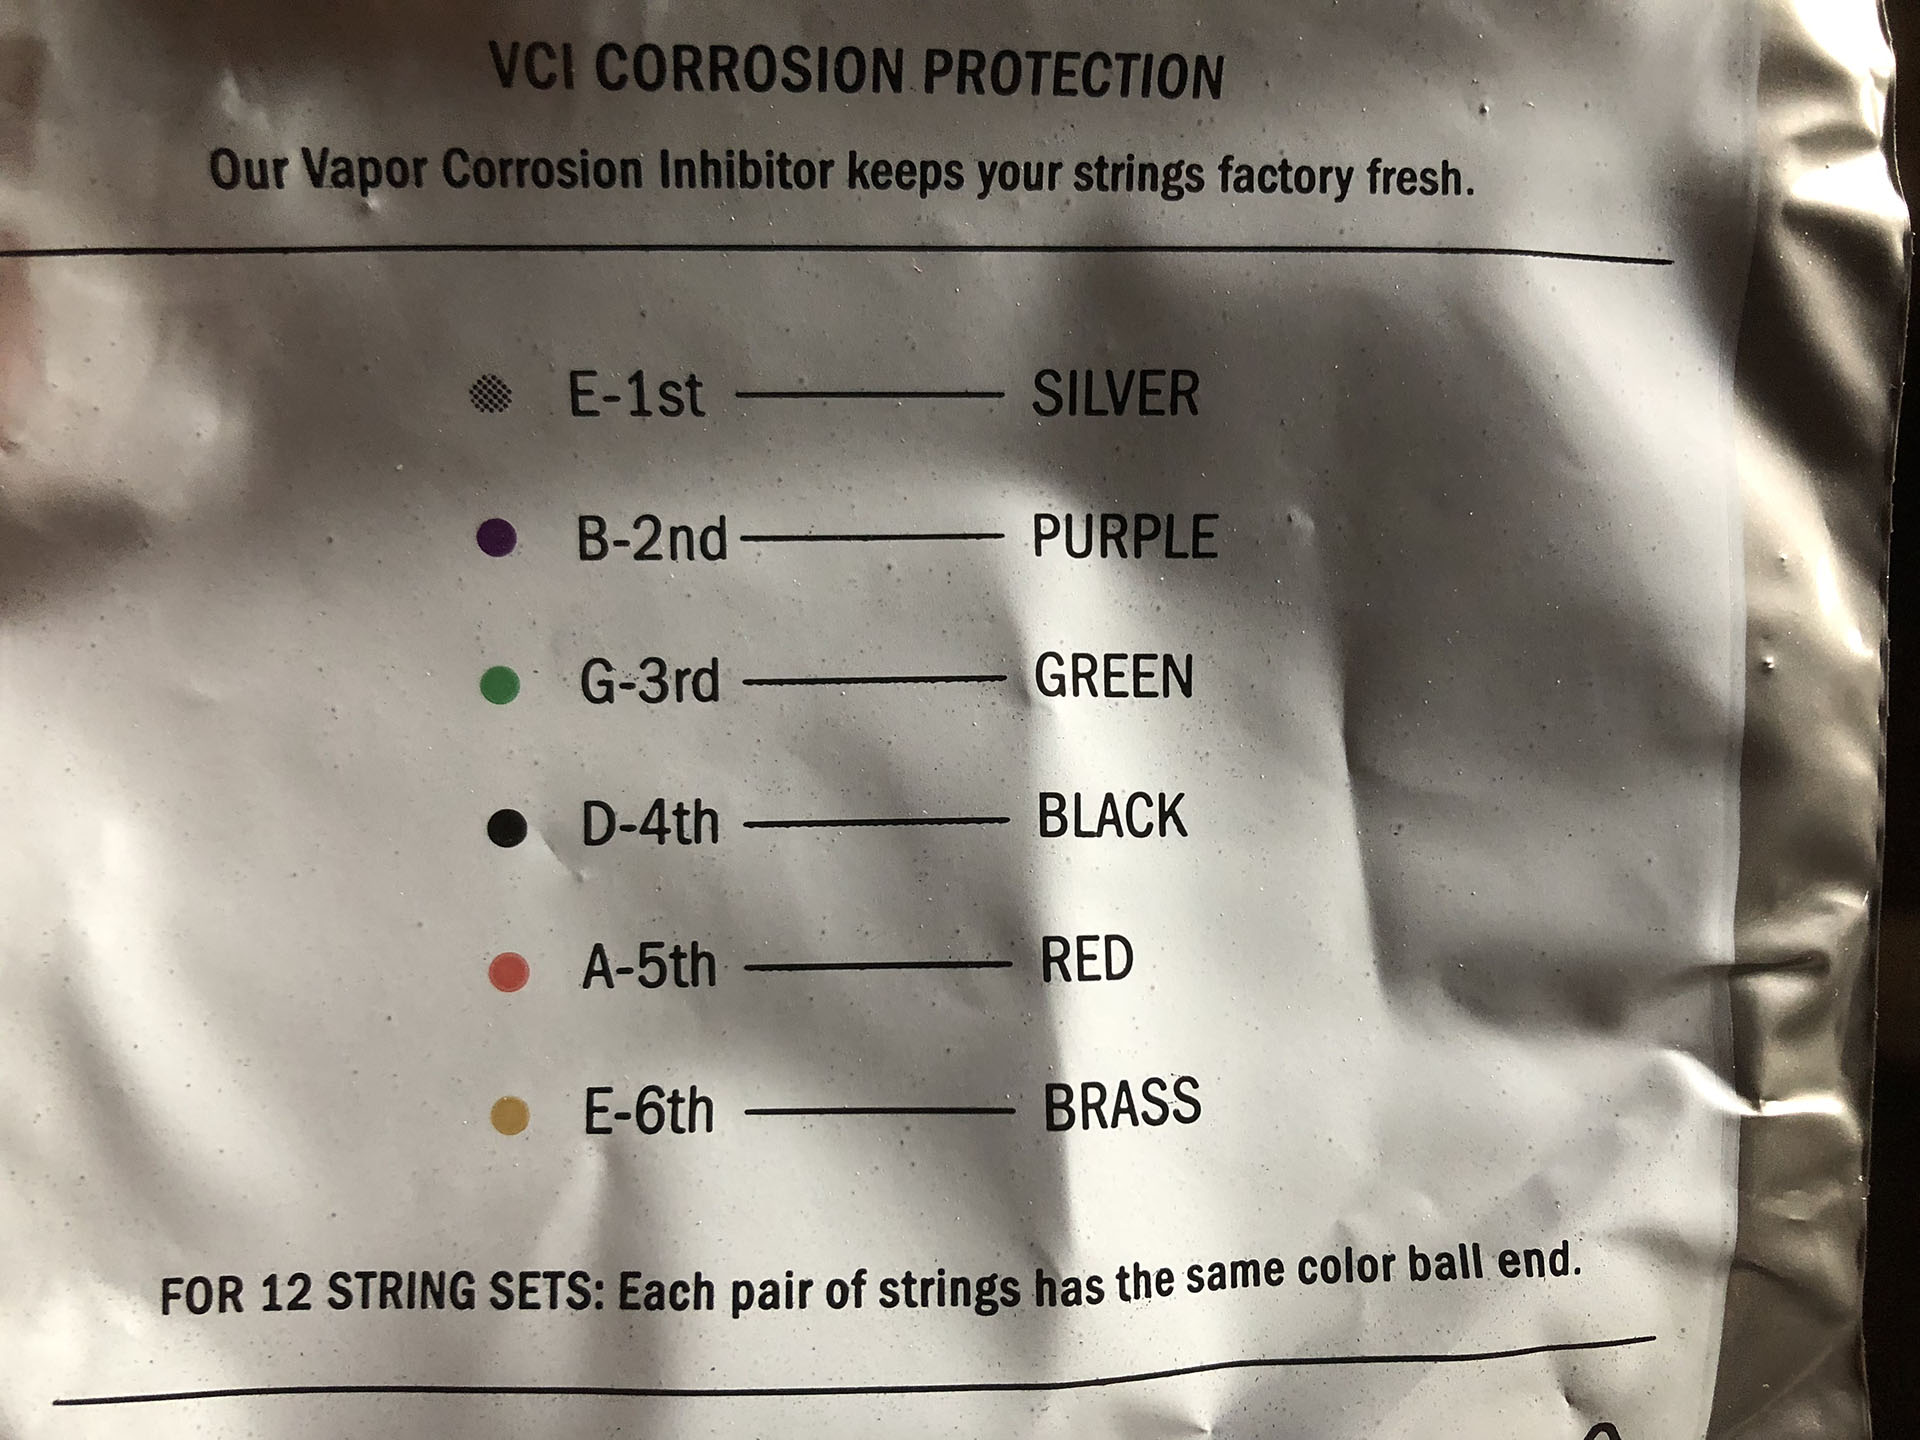
| − | == | + | ===Take the lowest string out of the new package of strings=== |
| + | [[File:String coding.jpg|400px|]] | ||
| + | <hr> | ||
| + | <br> | ||
| + | <br> | ||
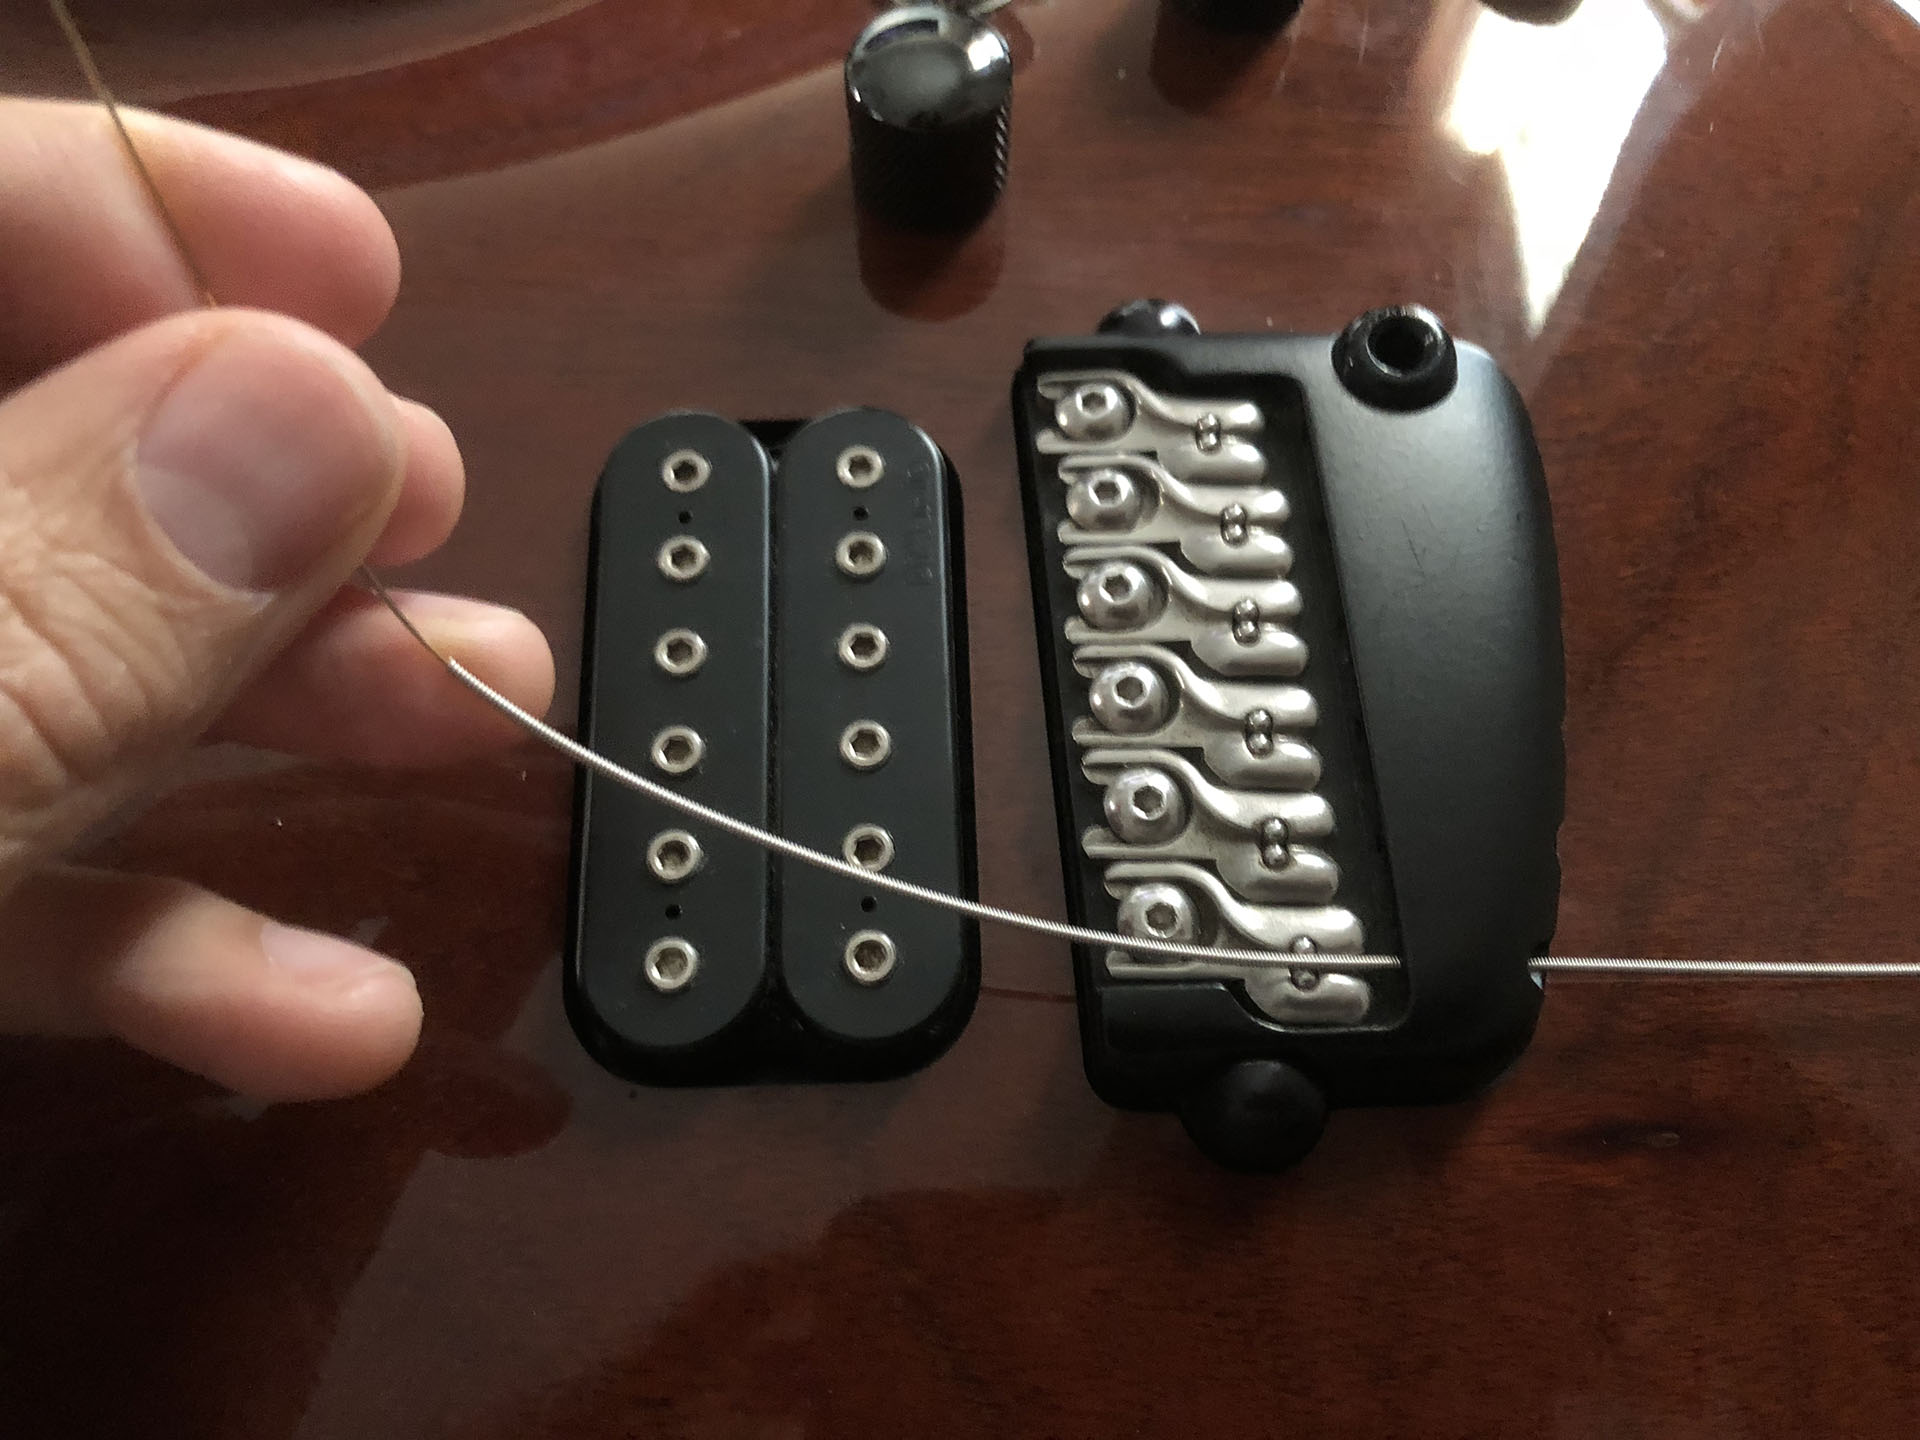
| − | == | + | ===Insert the new string through the hole of the bridge=== |
| + | [[File:Slip new string thru.jpg|400px|]] | ||
| + | <hr> | ||
| + | <br> | ||
| + | <br> | ||
| − | == | + | ===Turn the tuning peg so that the hole aligns straight with the angle of the string=== |
| + | [[File:Align tuner hole.jpg|400px|]] | ||
| + | <hr> | ||
| + | <br> | ||
| + | <br> | ||
| + | ===Put the string through the tuning peg hole=== | ||
| + | [[File:String new string thru tuner.jpg|400px|]] | ||
| + | <hr> | ||
| + | <br> | ||
| + | <br> | ||
| + | ===While pulling the string lightly, tighten the locking mechanism on the back of the tuning peg=== | ||
| + | [[File:Tighten lock.jpg|400px|]] | ||
| + | <hr> | ||
| + | <br> | ||
| + | <br> | ||
| − | [[ | + | ===Repeat the process for all other strings=== |
| + | <hr> | ||
| + | <br><br><br> | ||
| + | |||
| + | ==Tune the New Strings== | ||
| + | <br> | ||
| + | <br> | ||
| + | |||
| + | ===At the tuning peg, pull the excess string from the lowest string down to make a crease=== | ||
| + | <mediaplayer image='https://vjmedia.wpi.edu/images/d/dc/Crease_string.jpg'>File:Crease string.m4v</mediaplayer> | ||
| + | <hr> | ||
| + | <br> | ||
| + | <br> | ||
| + | |||
| + | ===Cut the excess string just above the hex plate that holds the tuning peg into the headstock=== | ||
| + | [[File:Clip excess string.jpg|400px|]] | ||
| + | <hr> | ||
| + | <br> | ||
| + | <br> | ||
| + | |||
| + | ===Tune the string to pitch using a tuner=== | ||
| + | [[File:Tuner.jpg|400px|]] | ||
| + | <hr> | ||
| + | <br> | ||
| + | <br> | ||
| + | |||
| + | ===Repeat the process for all other strings=== | ||
| + | <hr> | ||
| + | <br> | ||
| + | <br> | ||
| + | |||
| + | ===Tune all string to pitch from lowest to top until all strings are in tune=== | ||
| + | <hr> | ||
| + | <br> | ||
| + | <br> | ||
| + | |||
| + | |||
| + | ===Clean the microfiber cloth by running it under water for a few minutes === | ||
| + | <hr> | ||
| + | <br> | ||
| + | <br> | ||
| + | |||
| + | |||
| + | ===Tying Strings for Guitars without Locking Tuners=== | ||
| + | <youtube>https://youtu.be/5yRcm2GiLsE</youtube> | ||
| + | |||
| + | |||
| + | ==Additional Info== | ||
| + | Here are additional specialized instructions for changing strings: | ||
| + | <br><br> | ||
| + | |||
| + | ===Classical strings=== | ||
| + | <youtube>https://www.youtube.com/embed/4Cw84_0KHTI</youtube> | ||
| + | <br><br> | ||
| + | |||
| + | ===Classical strings with Sperzel Ny-Loc tuners=== | ||
| + | [[File:Nyloc.jpg|thum|left|frameless|Nyloc|400px|link=File:Nyloc.jpg]] | ||
| + | |||
| + | <br><br><br><br><br><br><br><br><br><br><br><br> | ||
| + | |||
| + | <br><br><br><br><br><br><br><br><br><br><br><br> | ||
| + | |||
| + | =Strings in the Lab= | ||
| + | These are V.J.’s recommendations for strings and what we use in the lab:<br> | ||
| + | |||
| + | ==Electric strings== | ||
| + | * D'Addario EXL110 .010 gauge (10-46) strings | ||
| + | |||
| + | ==Acoustic strings== | ||
| + | * D'Addario EJ26 Phosphor Bronze .011 gauge strings | ||
| + | |||
| + | ==Nylon strings== | ||
| + | * La Bella 2001MH Medium-hard tension strings | ||
| + | * La Bella 413P Studio Professional Recording Strings | ||
| + | |||
| + | ==Bass strings== | ||
| + | * Fodera 65-125 nickel strings | ||
| + | |||
| + | [[Category:Electric Guitar Innovation Lab]] | ||
Latest revision as of 01:47, 28 March 2022
Important: Go slowly with every part of this process in order to minimize the risk of damaging the instruments, cutting yourself, or poking your eye out with an old guitar string. Place the guitar on a flat surface that is covered with a towel or other soft surface.
Special Note: Do not use any solvents, cleaners, oils, or other things on fretboards while changing the strings; for Parker Fly guitars, you may use a little water on a microfiber cloth to clean the fretboard.
Supplies Needed
- guitar or bass with old strings
- new strings (located in lab on pegboard in a bin labeled "new strings")
- string cutters (located in lab on pegboard)
- needle-nose pliers (located in lab on pegboard)
- microfiber cloth (located in lab on pegboard)
- tuner (located in lab on pegboard in bin nearest door)
Remove the Old Strings
Detune the lowest string with the tuning peg until it drops as low as it can go
The media player is loading...
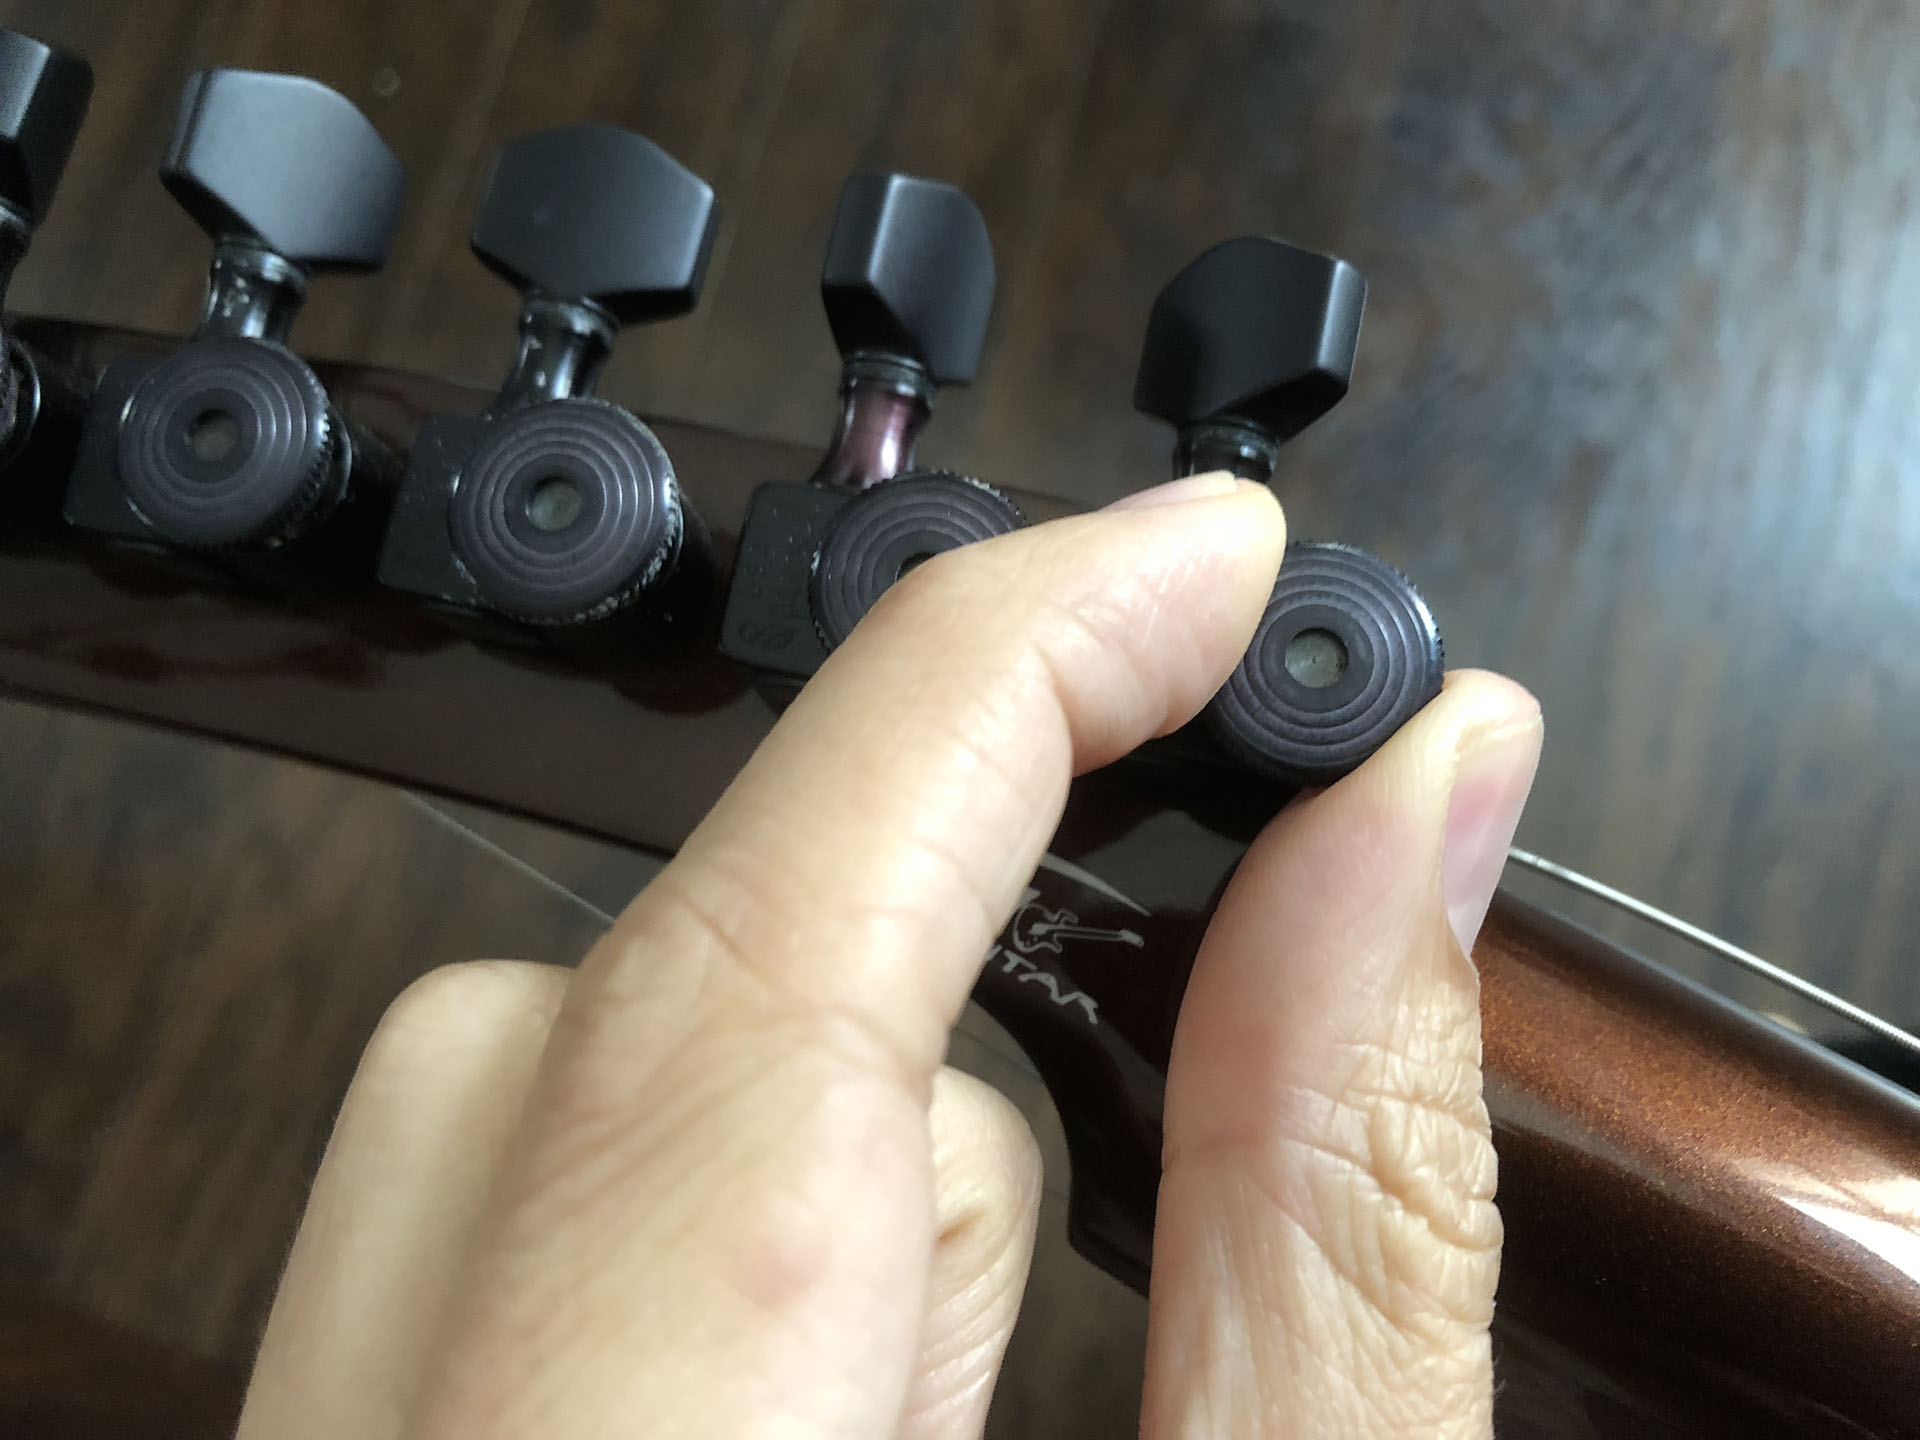
Loosen the locking mechanism on the back of the tuning peg as much as it will loosen
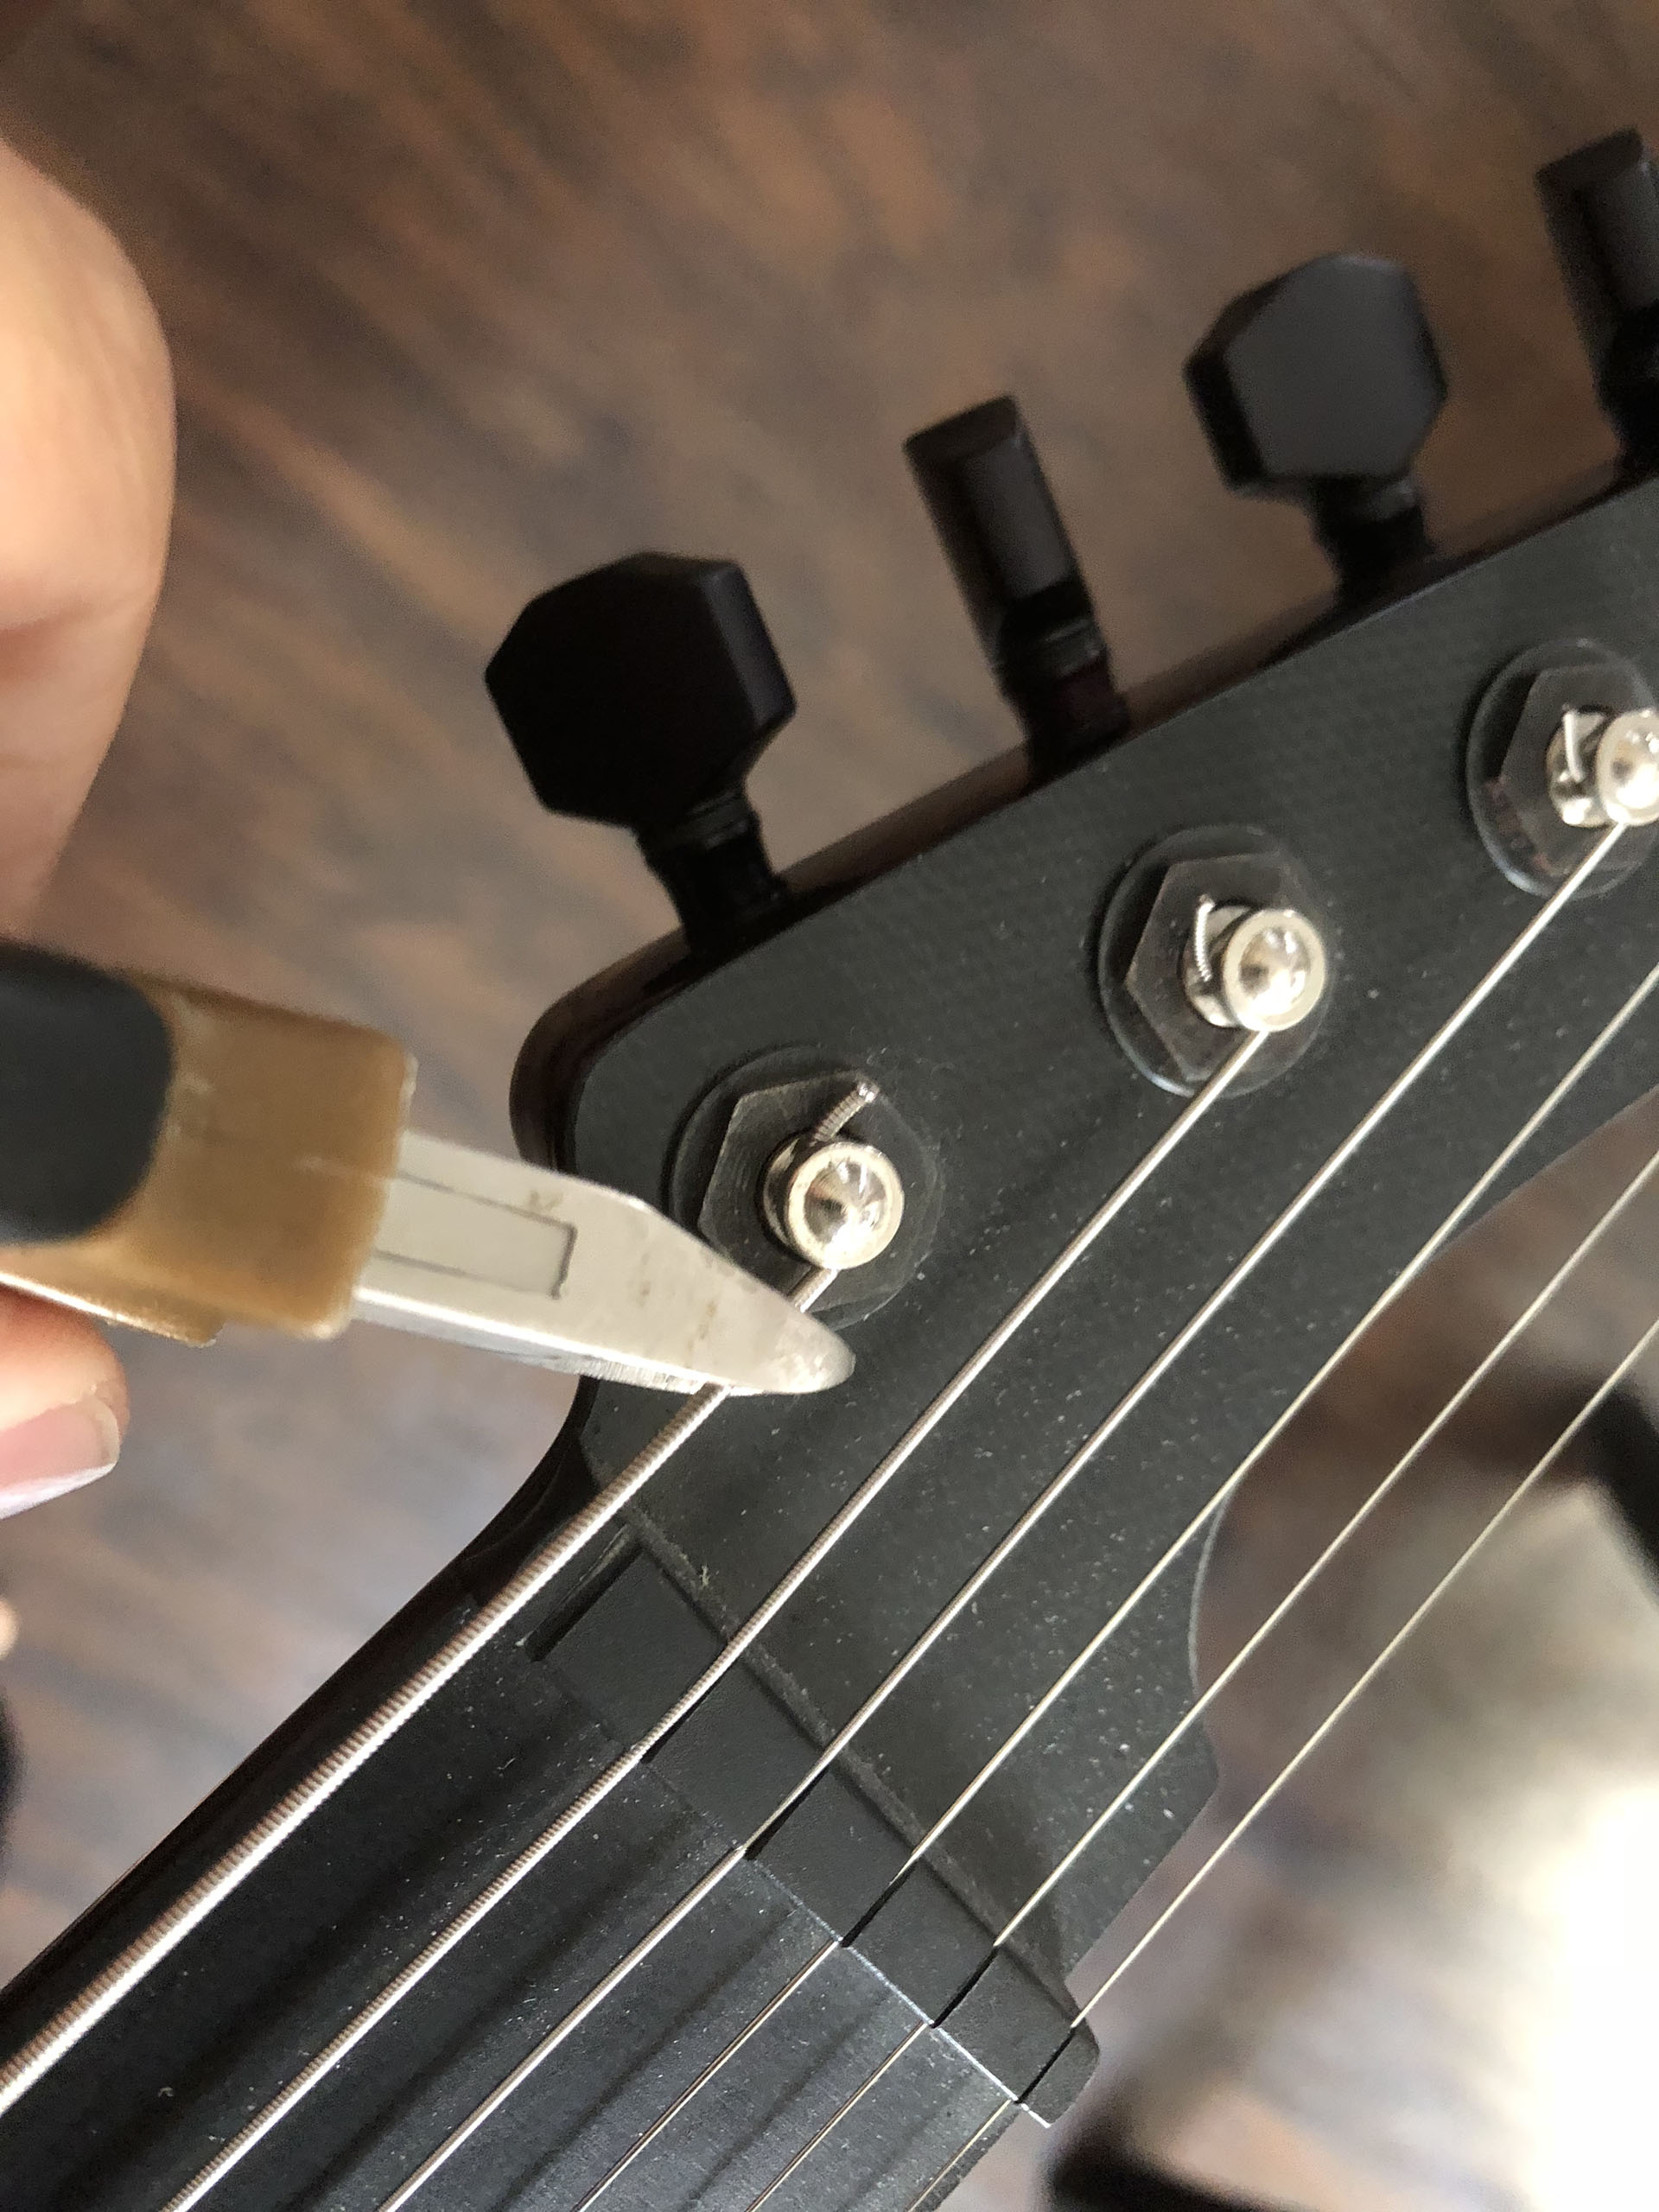
Carefully cut the end of the string with string cutters above the hex plate that holds the tuning peg into the headstock
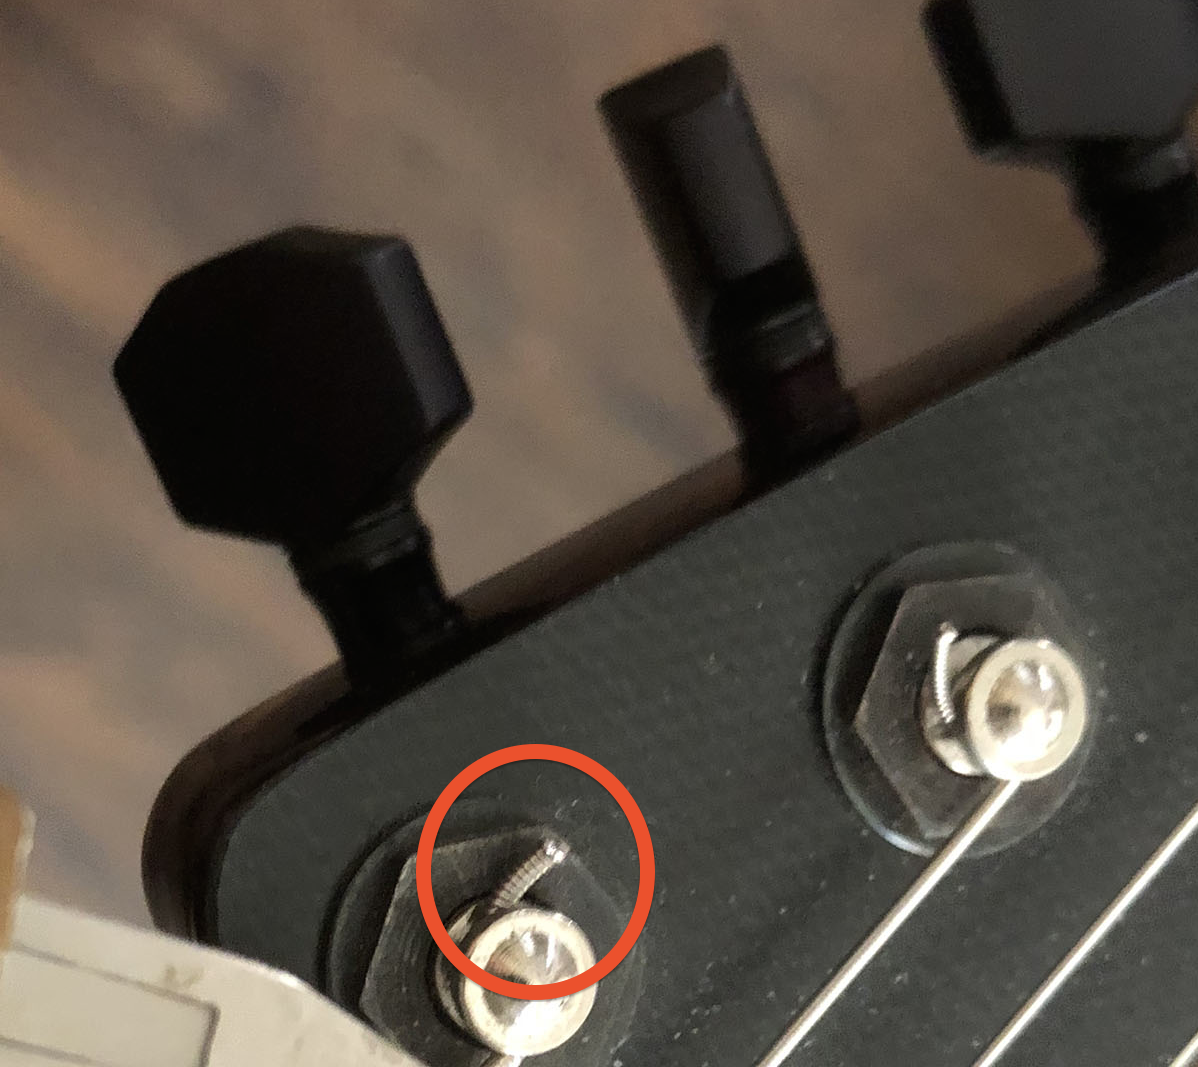
Carefully pull the string out of the hole with needle-nose pliers (Do not use anything sharp!)
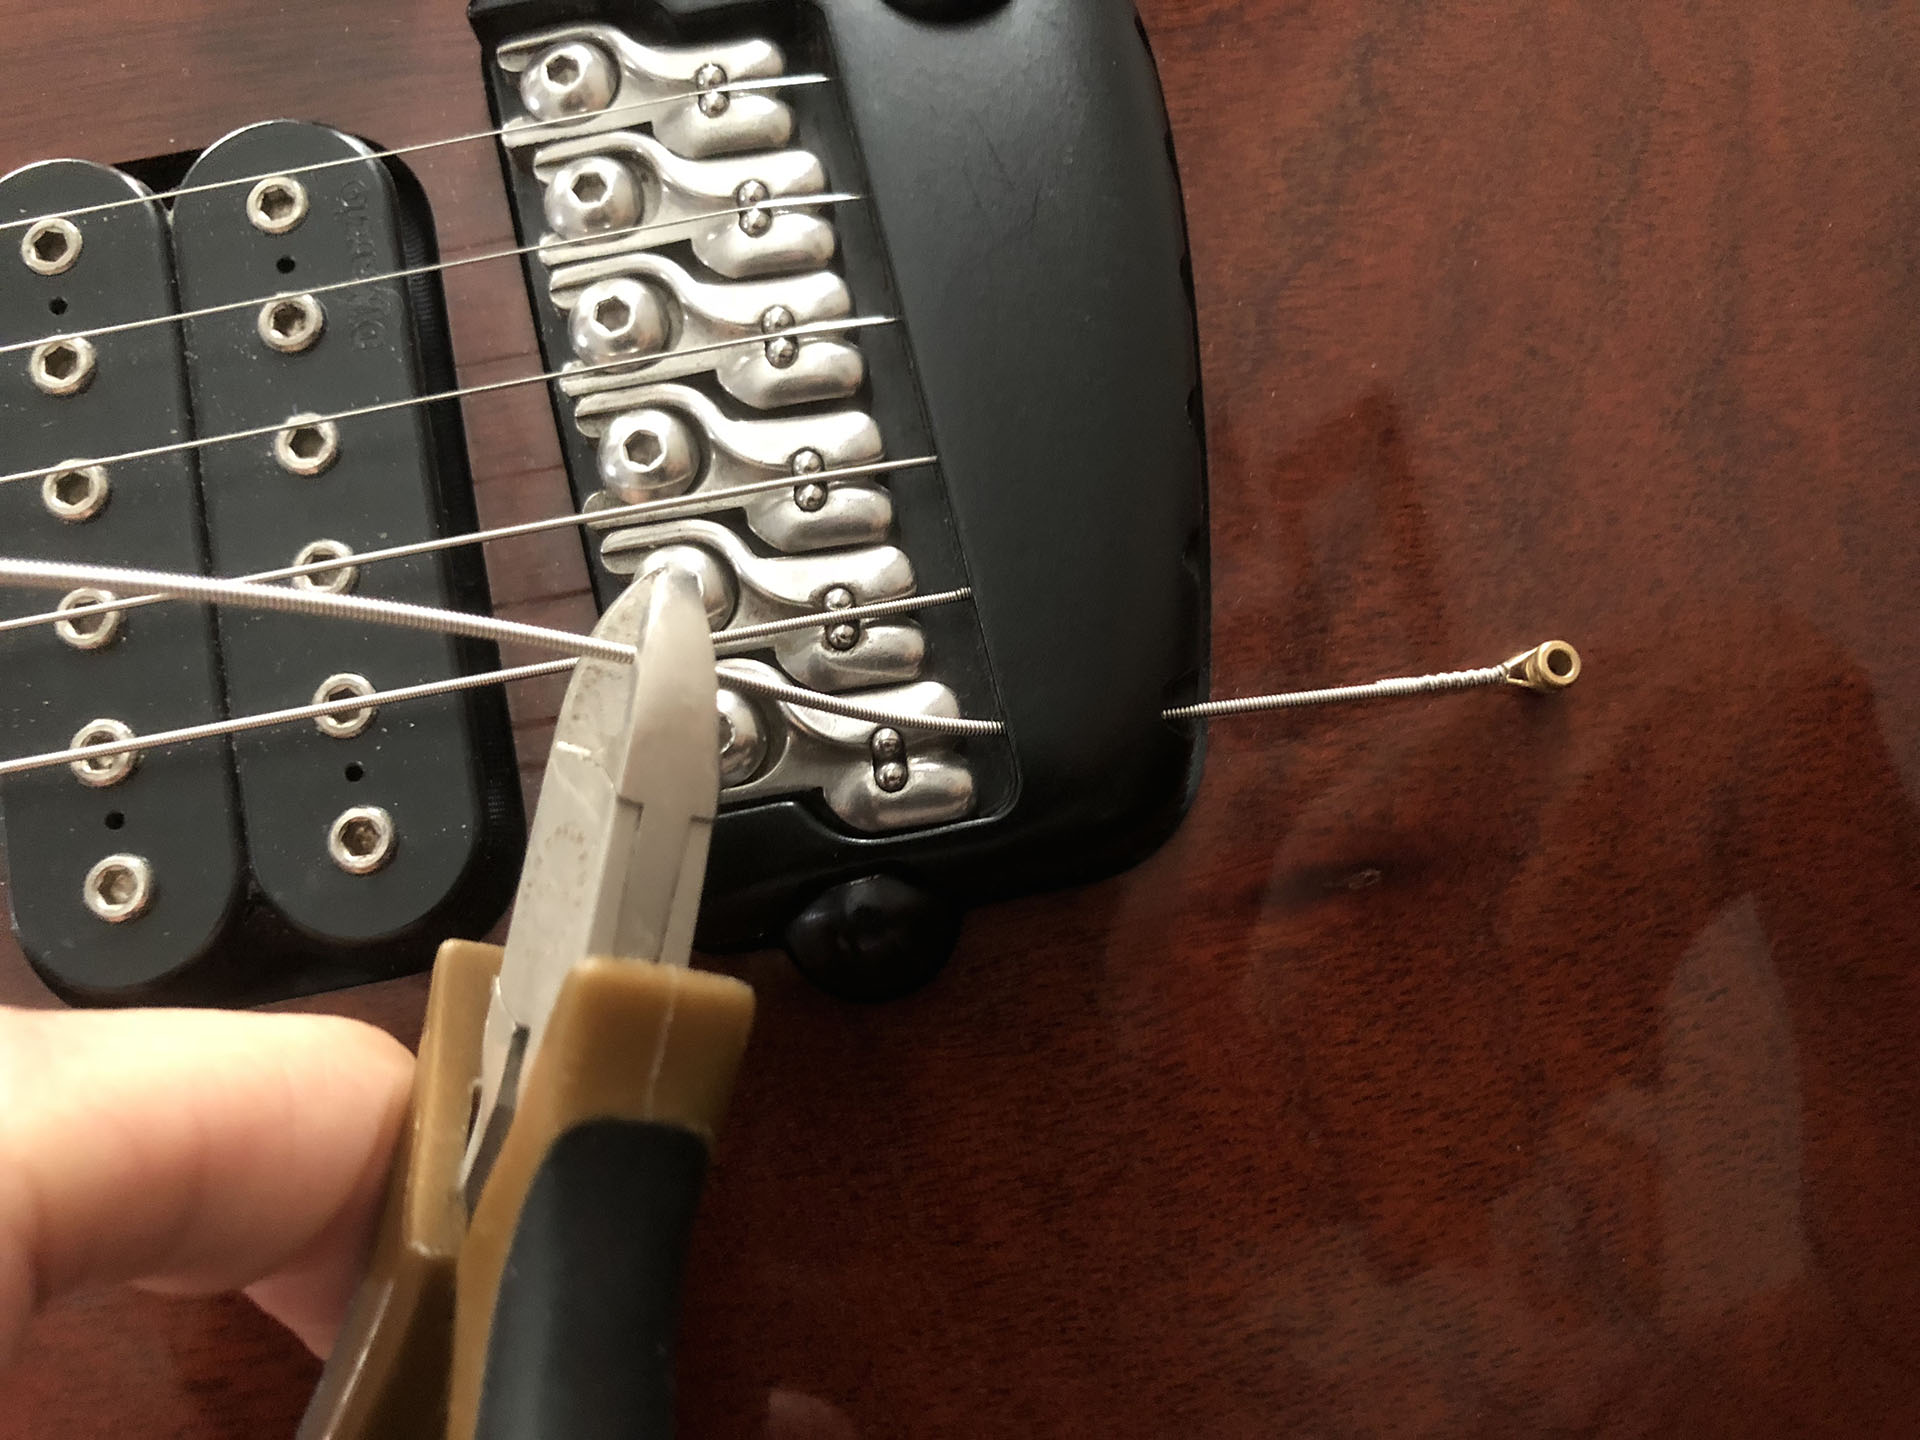
Gently push the string 1 inch through the hole of the bridge
Cut the string above the bridge
Very gently pull the remainder of the string through the bridge
Repeat the process for all other strings
Throw away the old strings including any clippings
Gently wipe down the fretboard and body with a dry microfiber cloth removing any dirt seen; do not use any solvents, oils, or other chemicals on the fretboard and do not scratch the fretboard
Put on the New Strings
Wash your hands with soap and water; dry your hands
Take the lowest string out of the new package of strings
Insert the new string through the hole of the bridge
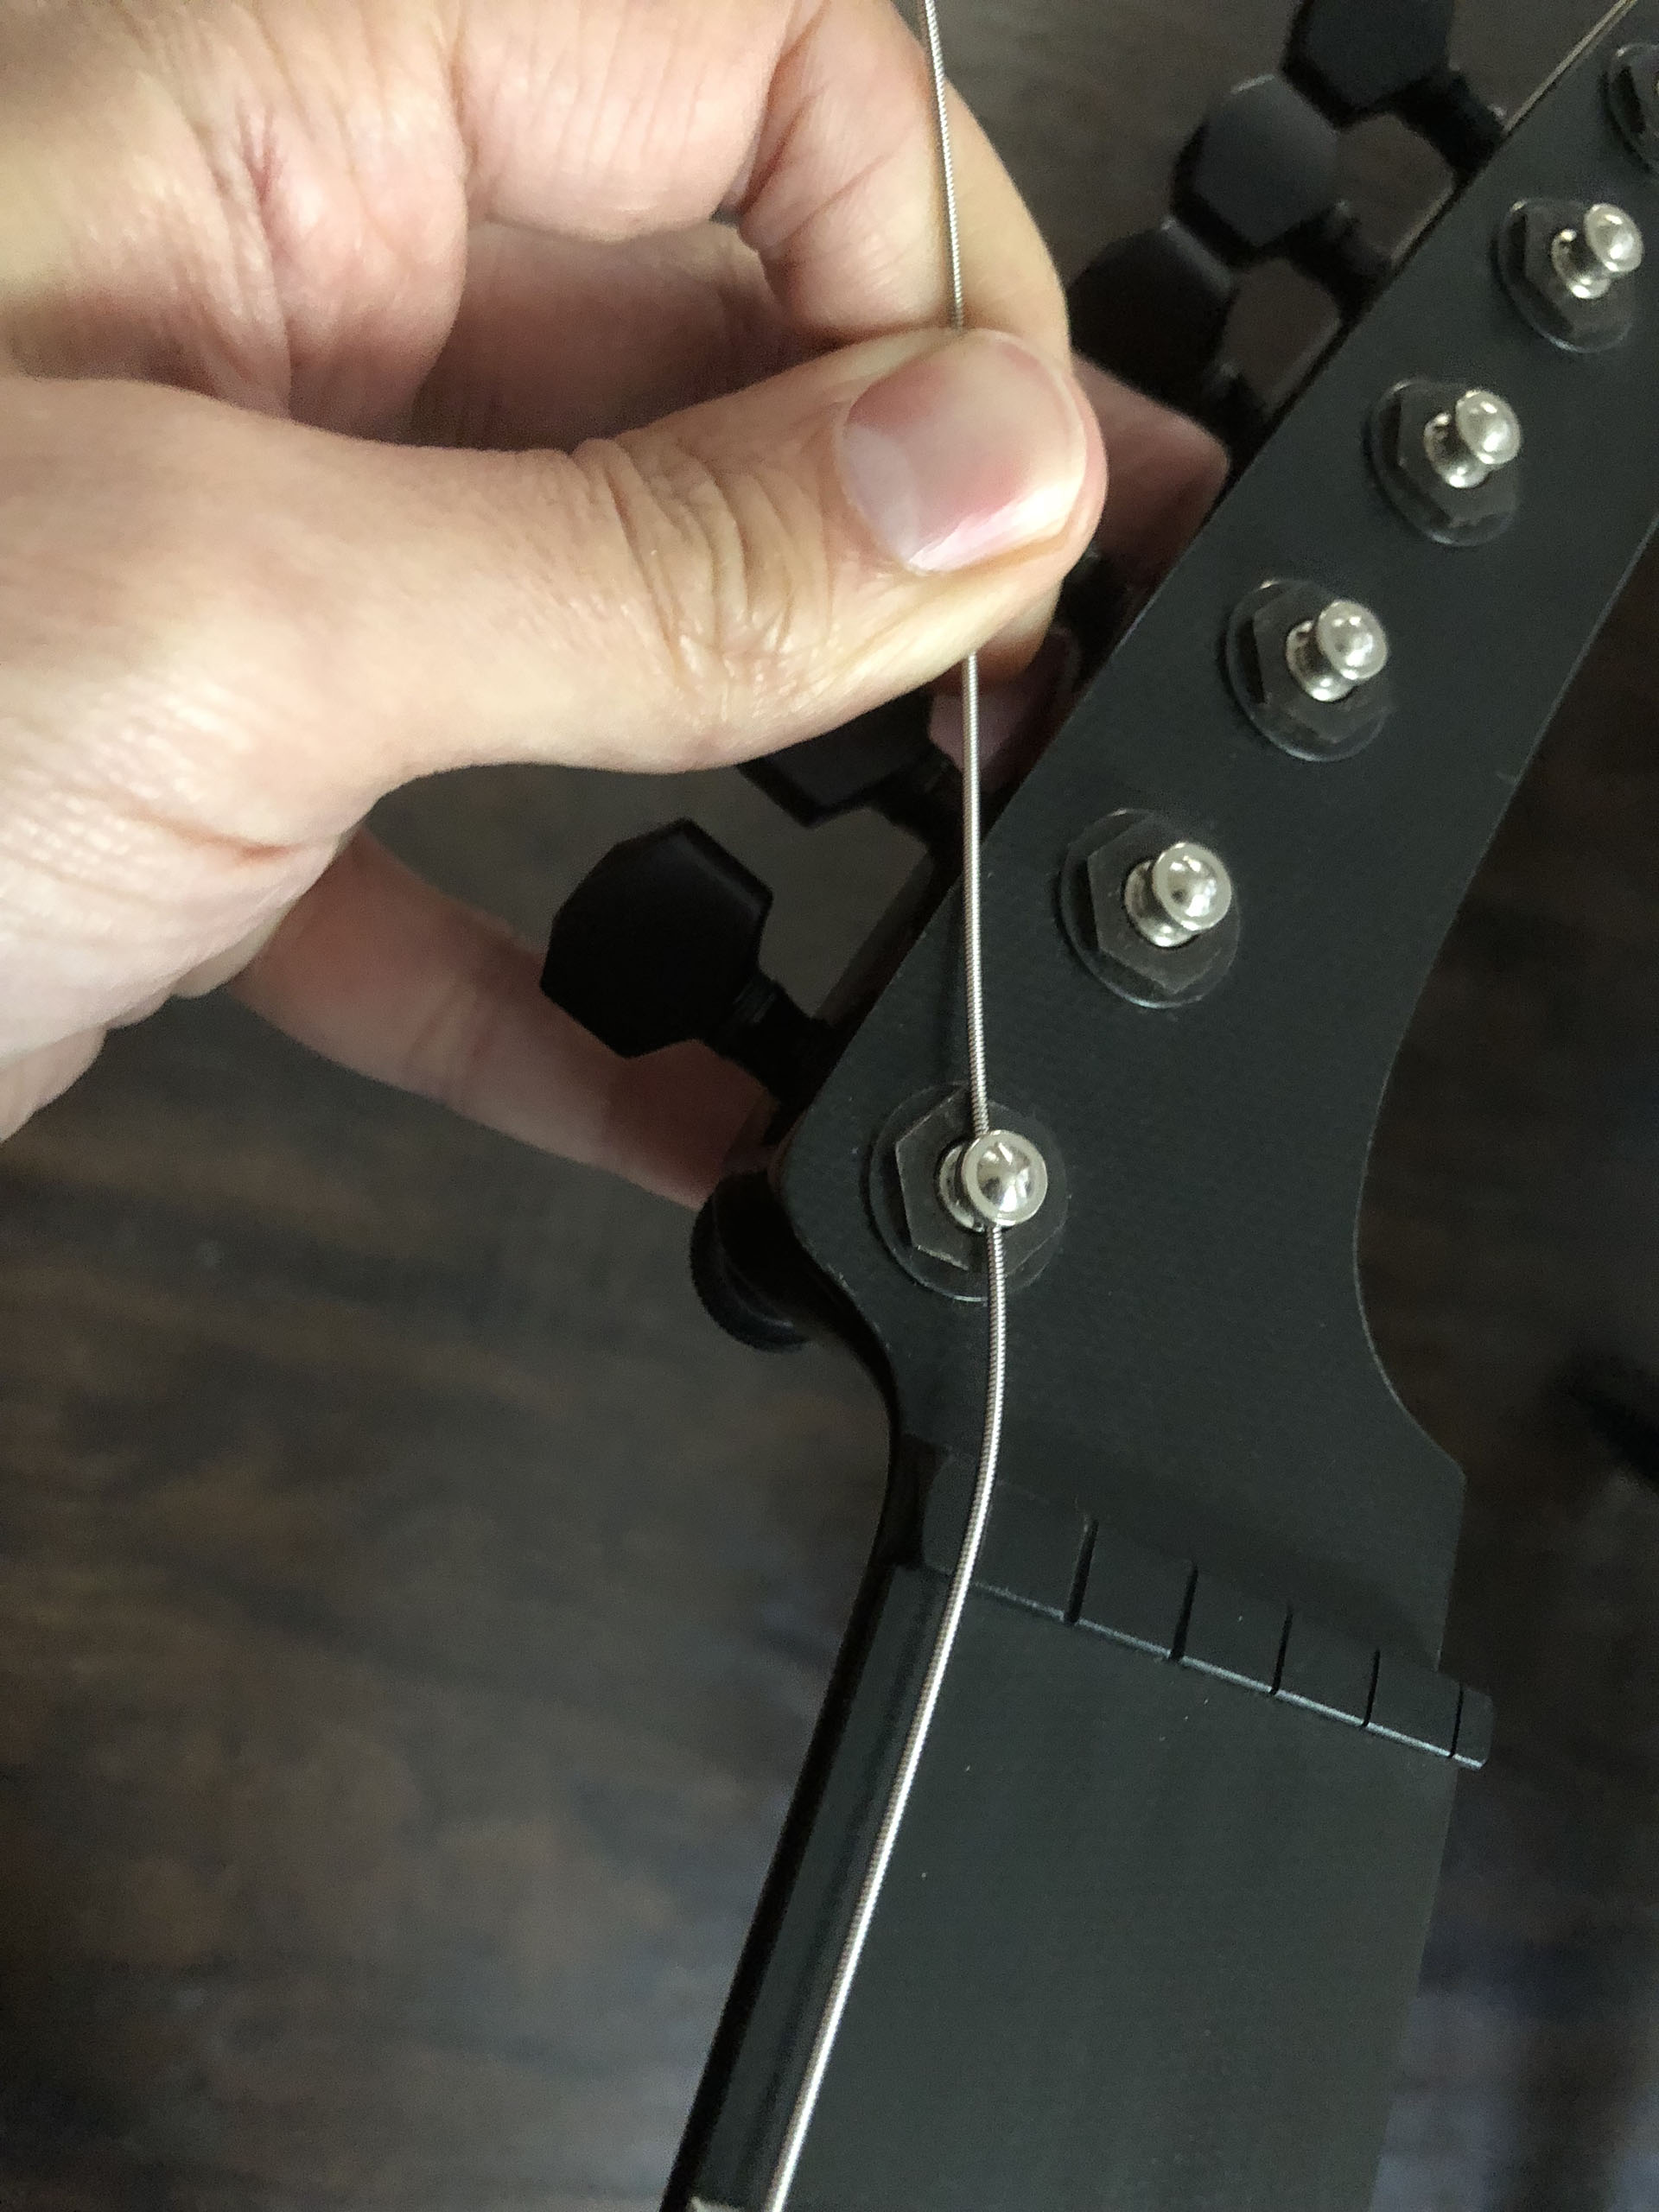
Turn the tuning peg so that the hole aligns straight with the angle of the string
Put the string through the tuning peg hole
While pulling the string lightly, tighten the locking mechanism on the back of the tuning peg
Repeat the process for all other strings
Tune the New Strings
At the tuning peg, pull the excess string from the lowest string down to make a crease
The media player is loading...
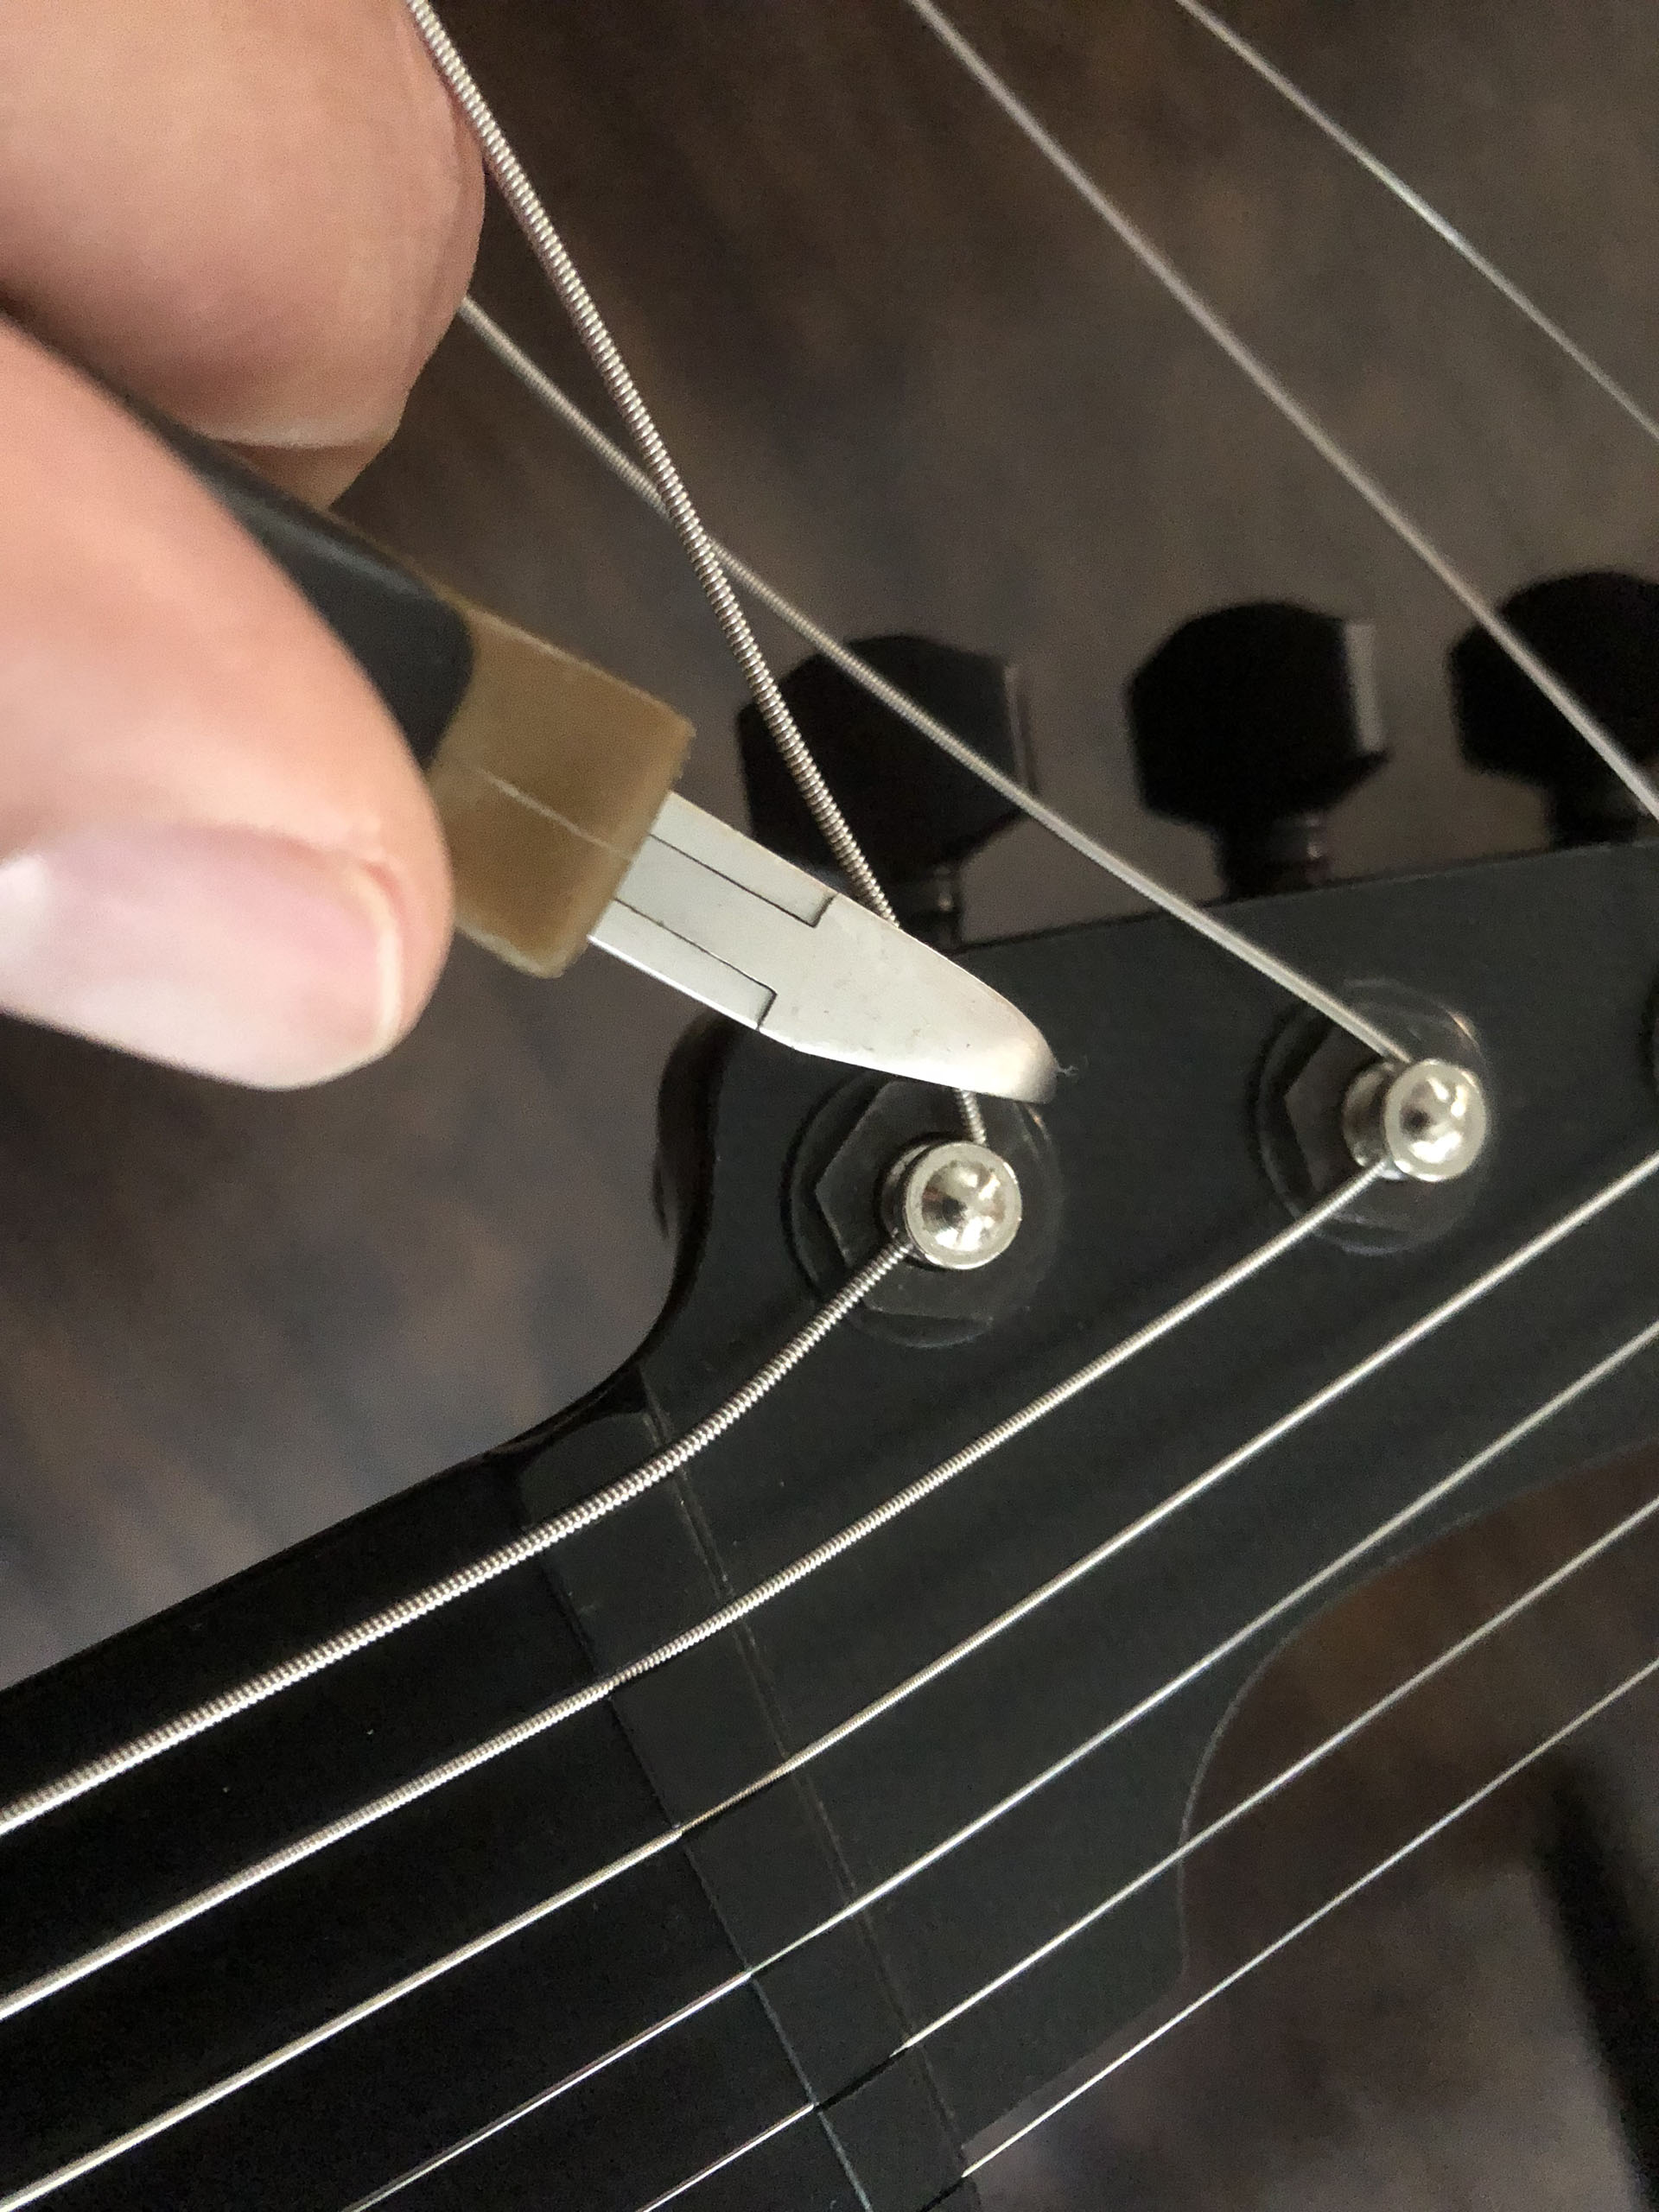
Cut the excess string just above the hex plate that holds the tuning peg into the headstock
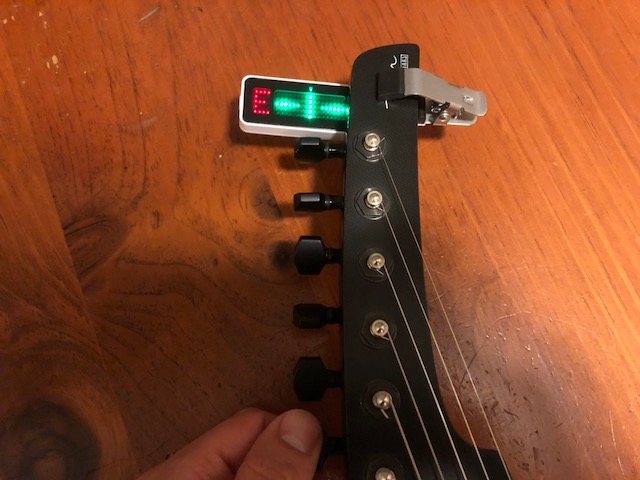
Tune the string to pitch using a tuner
Repeat the process for all other strings
Tune all string to pitch from lowest to top until all strings are in tune
Clean the microfiber cloth by running it under water for a few minutes
Tying Strings for Guitars without Locking Tuners
Additional Info
Here are additional specialized instructions for changing strings:
Classical strings
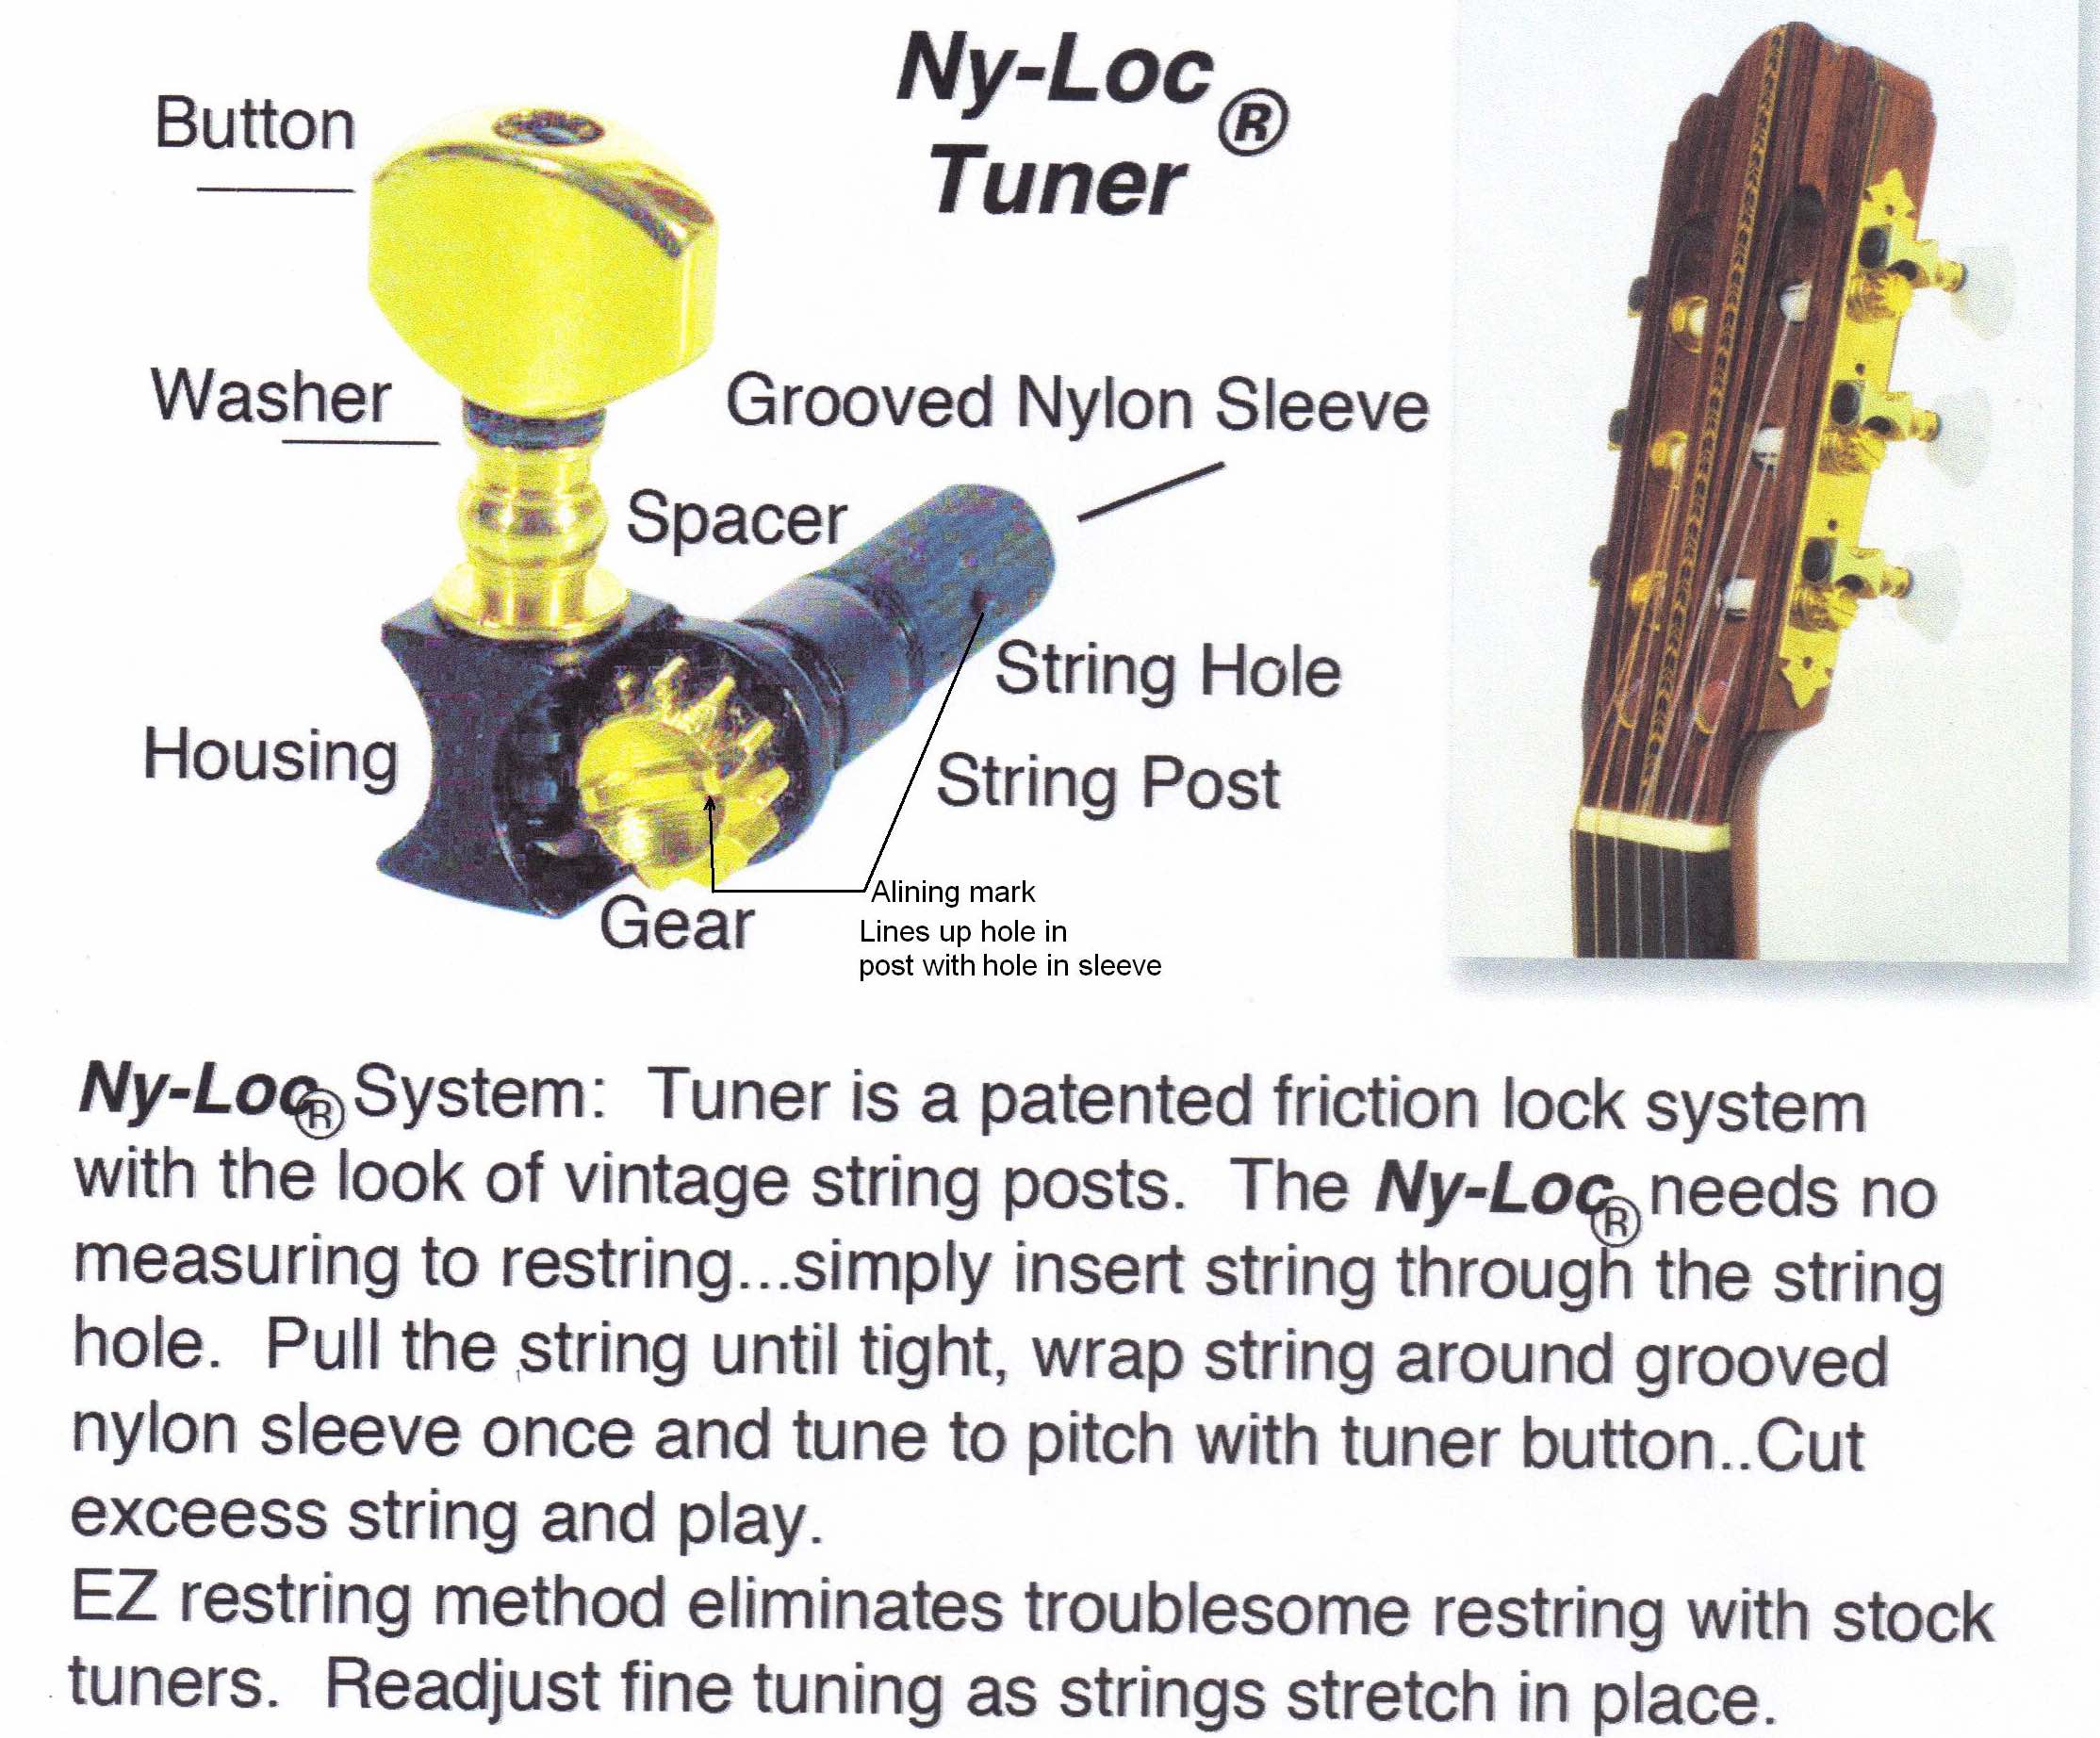
Classical strings with Sperzel Ny-Loc tuners
Strings in the Lab
These are V.J.’s recommendations for strings and what we use in the lab:
Electric strings
- D'Addario EXL110 .010 gauge (10-46) strings
Acoustic strings
- D'Addario EJ26 Phosphor Bronze .011 gauge strings
Nylon strings
- La Bella 2001MH Medium-hard tension strings
- La Bella 413P Studio Professional Recording Strings
Bass strings
- Fodera 65-125 nickel strings
